

- A bootable Windows 11 Pro USB drive
- A device that meets the Windows 11 requirements, including TPM 2.0 and Secure Boot, and that meets the PADS4 requirements
- A username and password for the local account
Step-by-step guide
- Boot the PC from the Windows 11 Pro USB drive and go through the installation as normal.
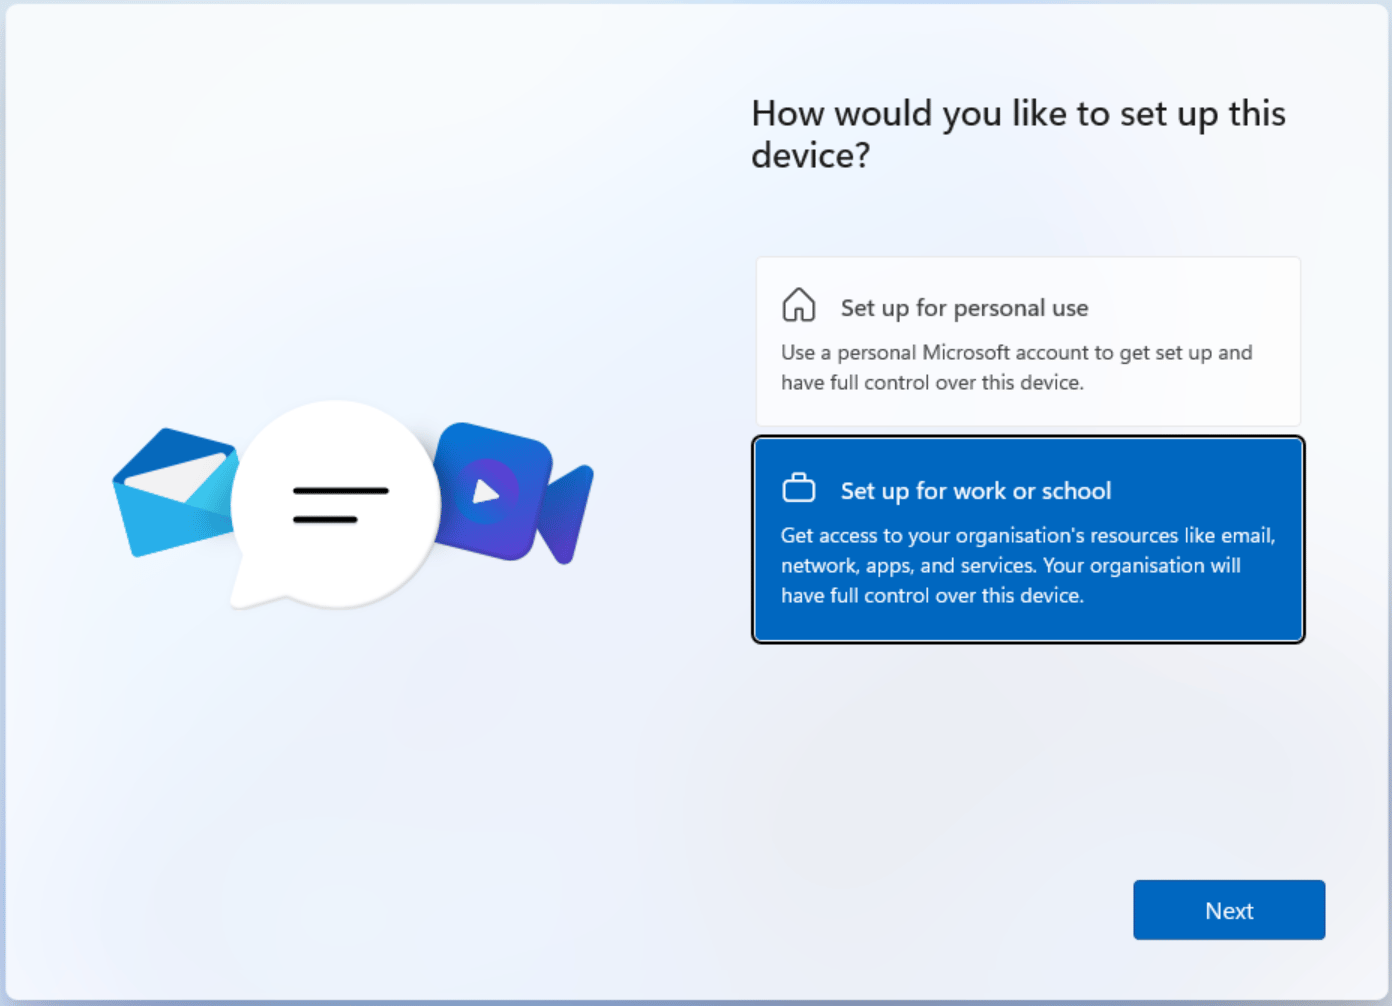
- On the screen “How would you like to set up this device?”, select Set up for work or school, then click Next.
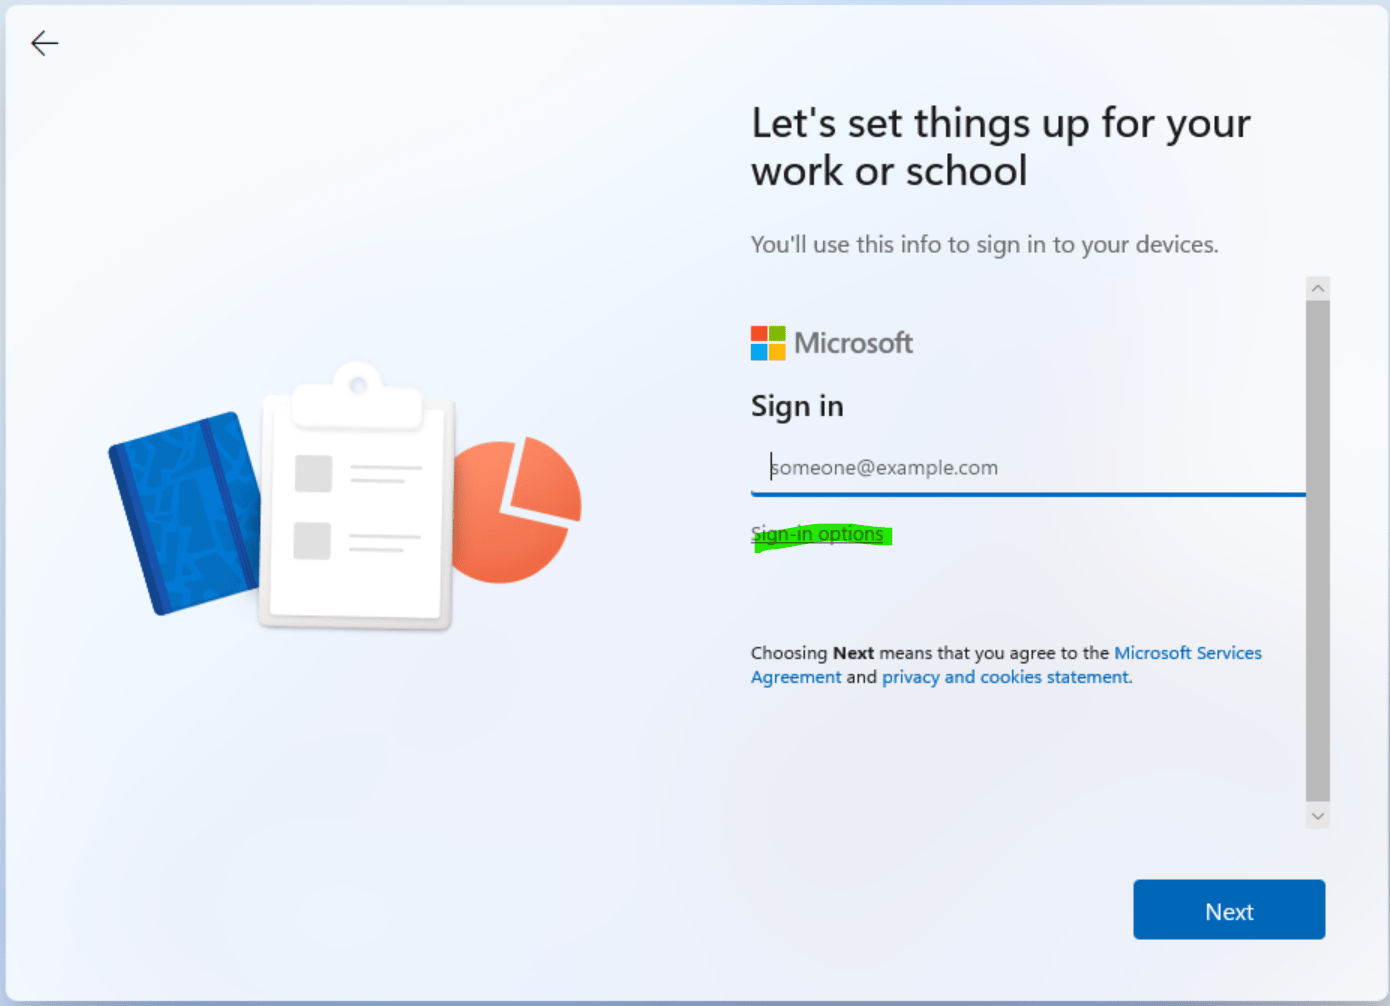
- When you are asked to sign in with a Microsoft account, click Sign-in options.
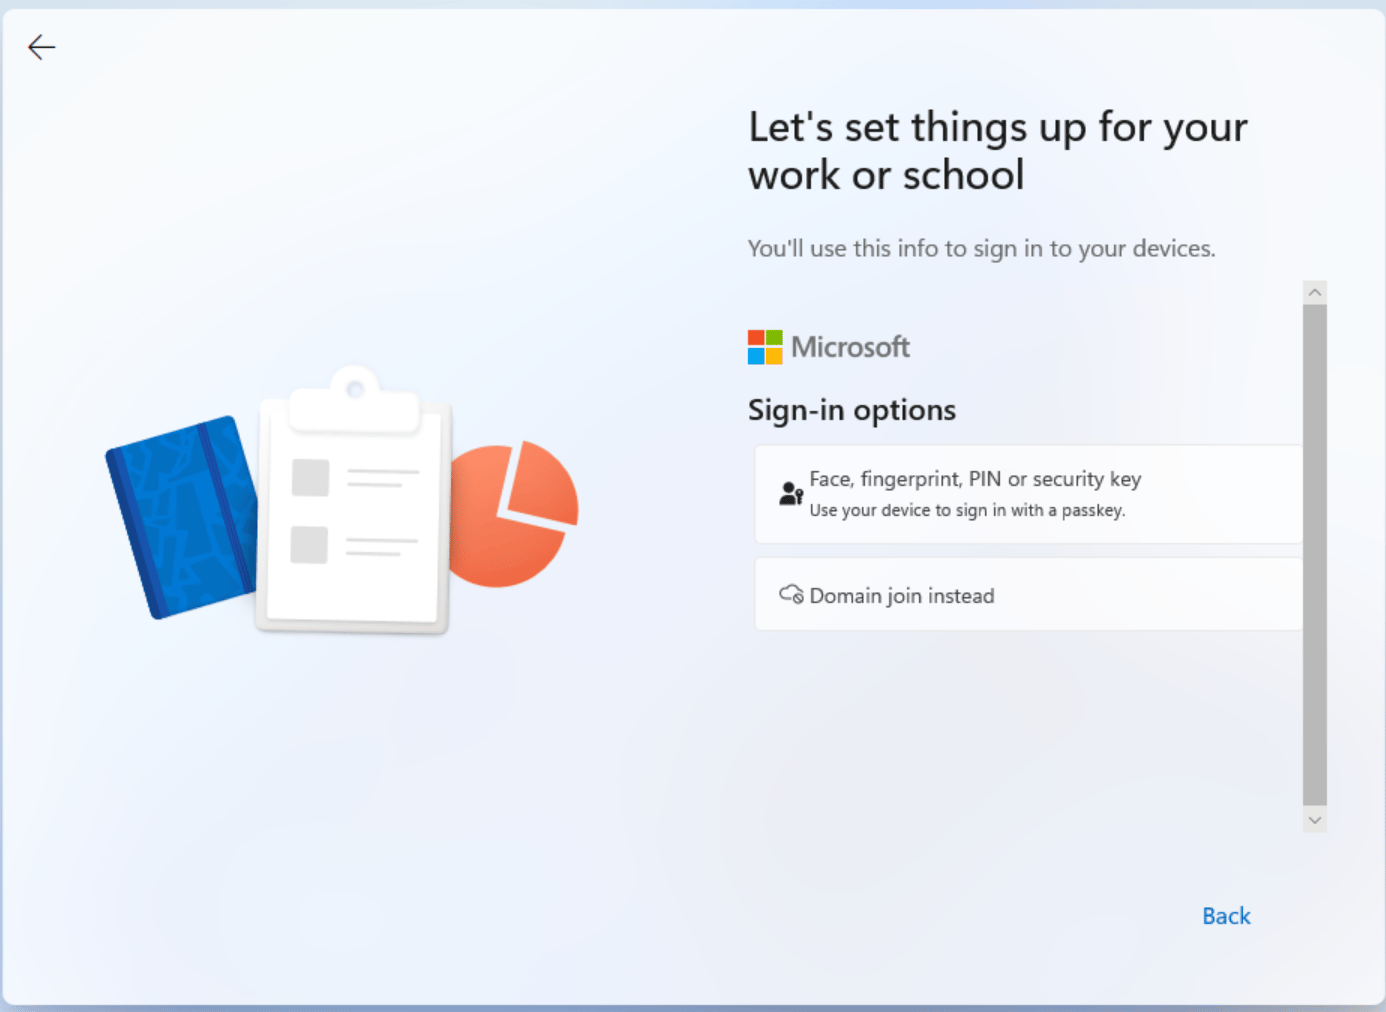
- Select Domain join instead.
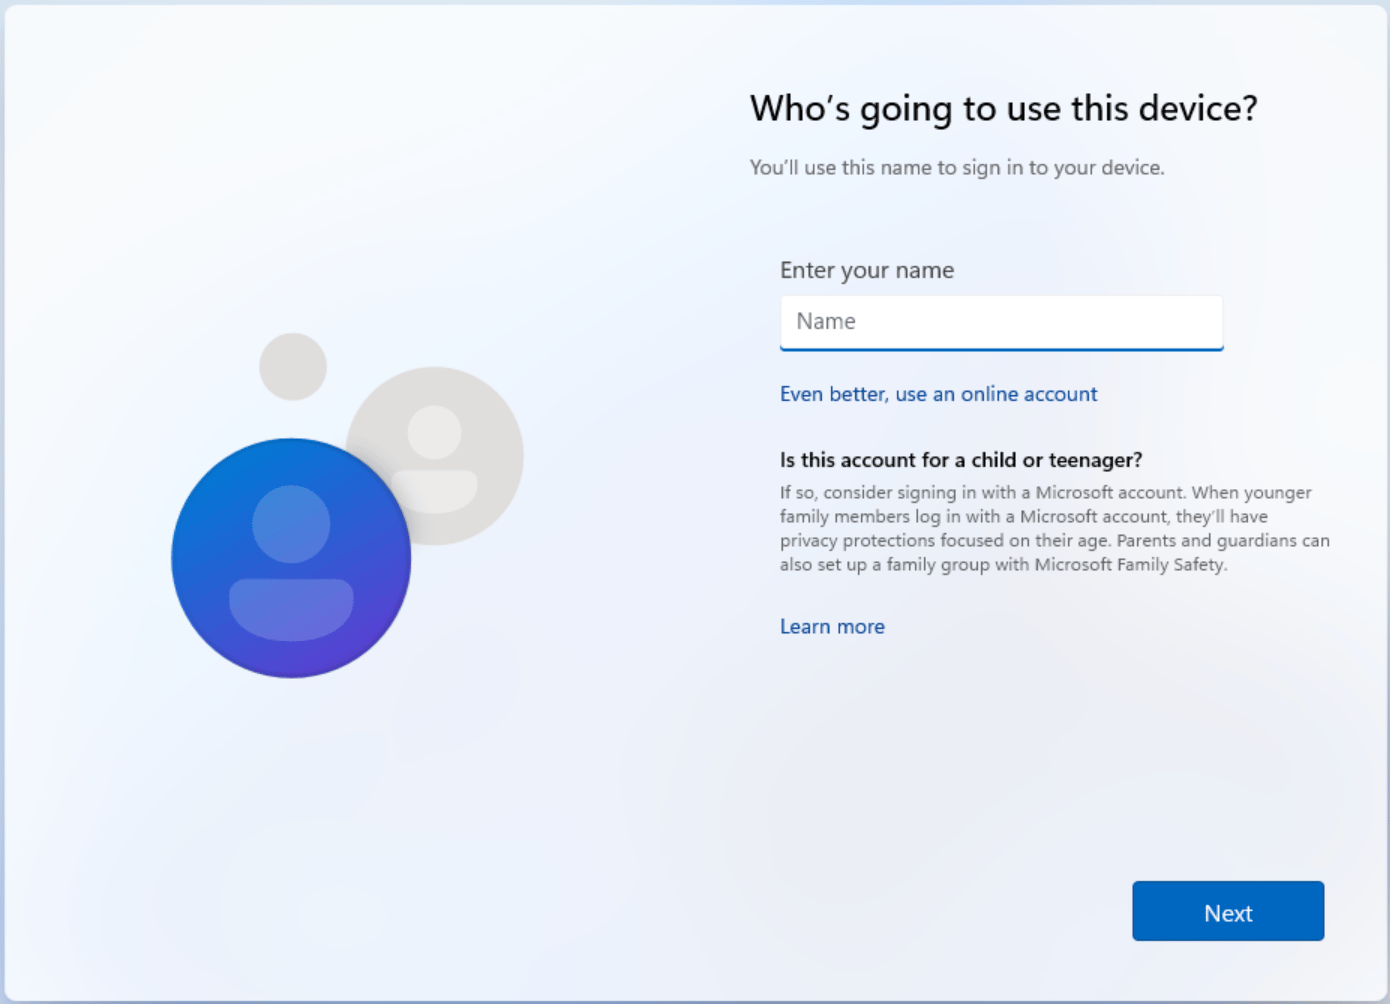
- Enter a username for the local account and click Next. Then enter a password and confirm it.
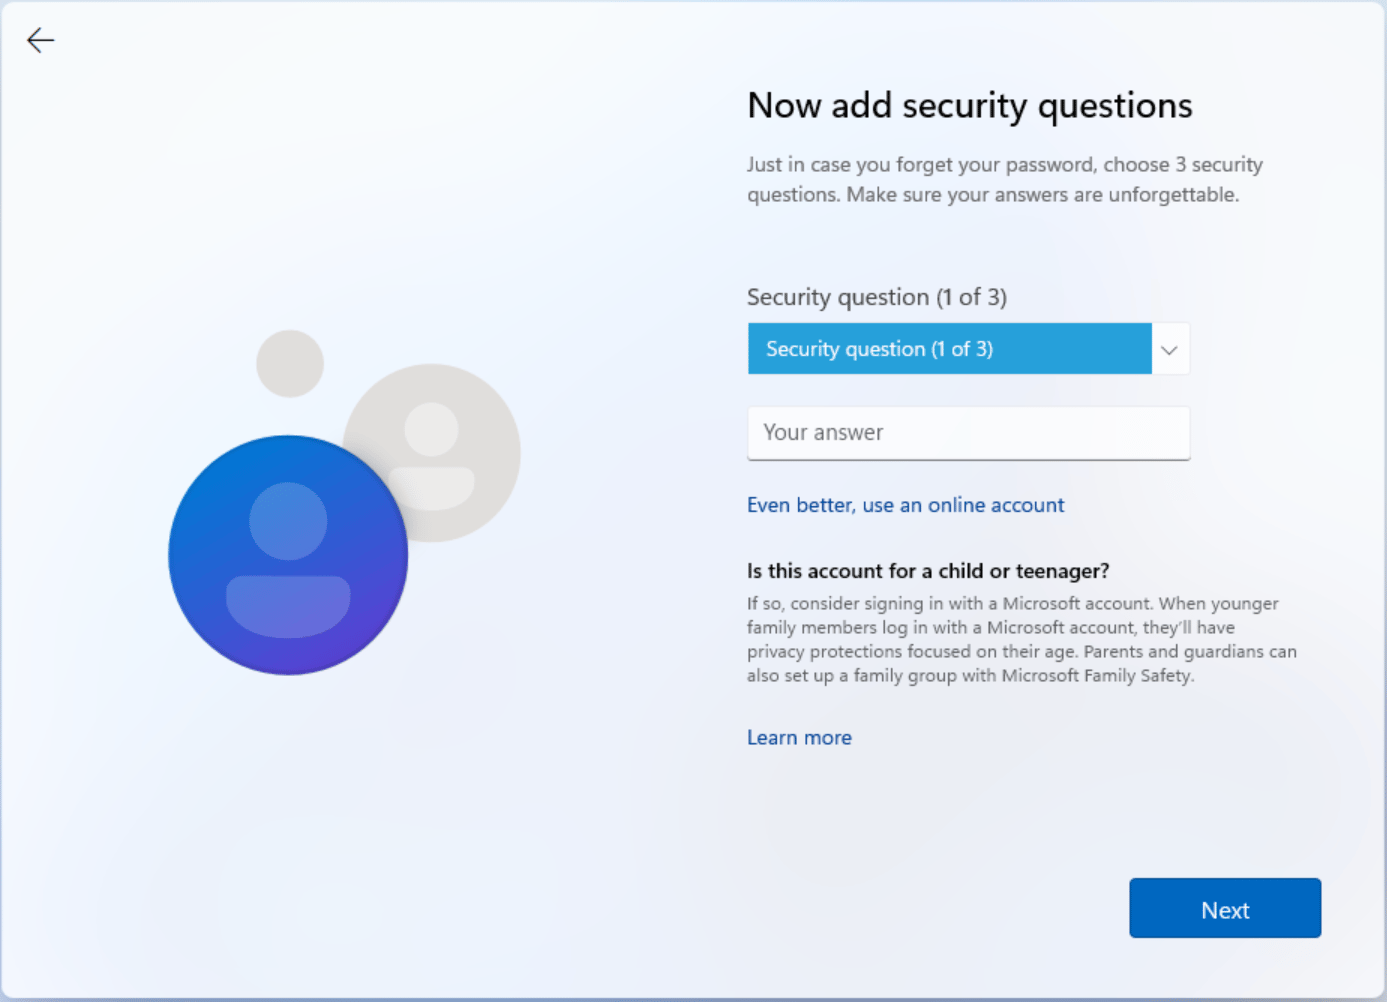
- Select three security questions and answer each one. Windows uses these to reset the password if you forget it.
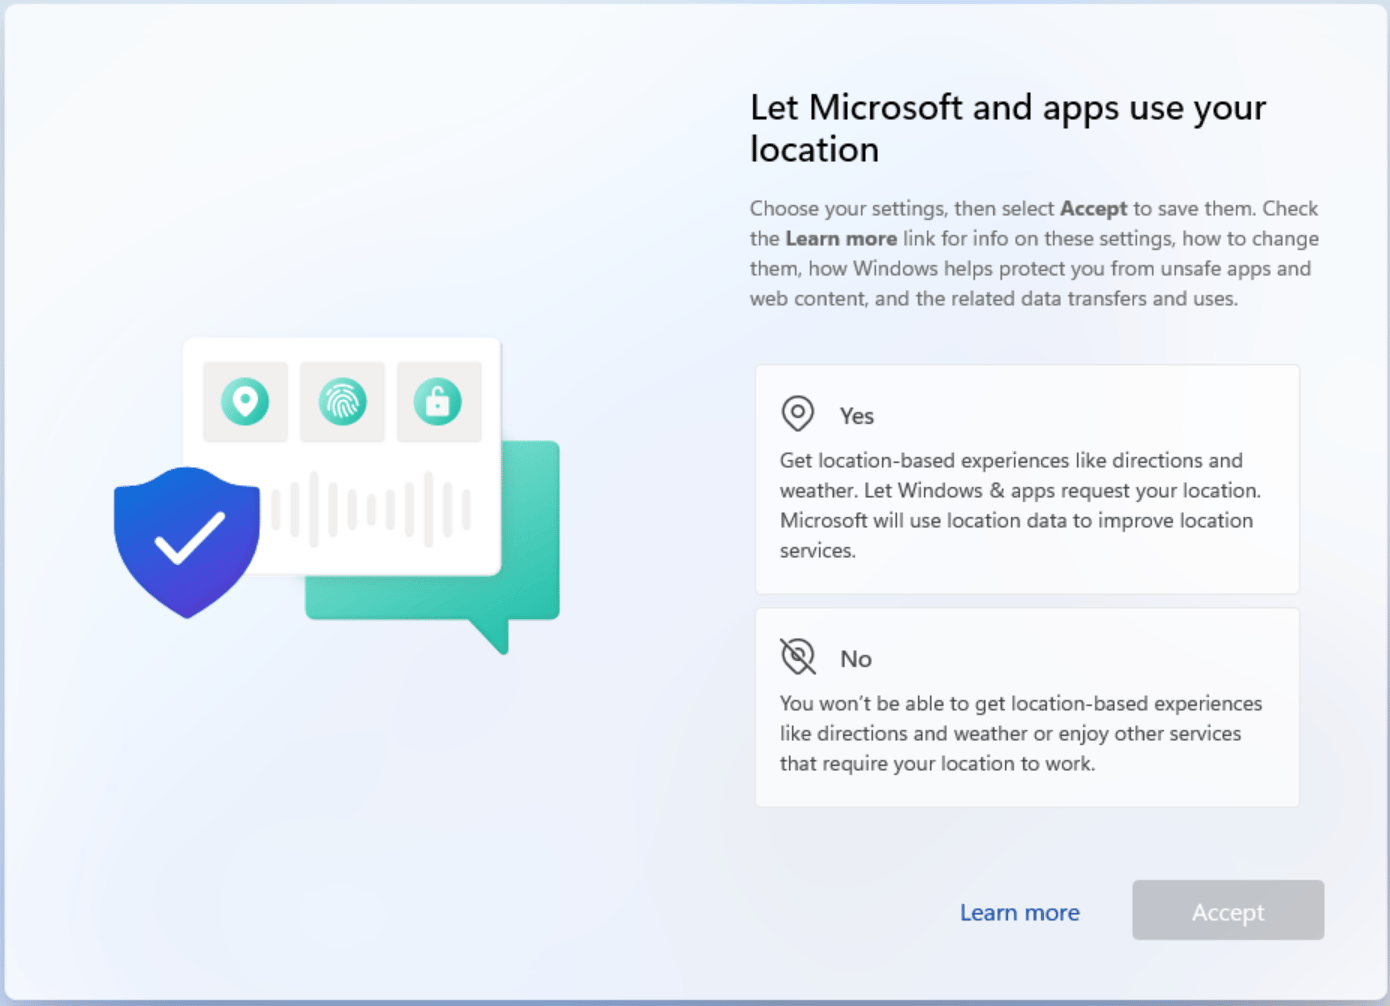
- Review the privacy settings (location, diagnostic data, and so on). Set each one as needed and click Accept.
- Windows finishes the setup and restarts. The PC then starts into Windows 11 Pro 26H2.
Command fallback
If the Domain join instead option is missing or the setup insists on an online account:- At the account/network screen, press Shift + F10 (or Shift + Fn + F10).
-
Run:
- A local account creation window appears. Create the username and password, and continue.