Starting a Reservation
To start a booking:- Click the “+” button located at the bottom-right of the screen.
Booking Window Fields
A booking window will open with the following fields:- Subject
Title of the meeting or reservation. - Participants
Internal participants you want to invite. - External Visitors
Guests outside your organization. - Date
Select the desired date and time for your booking. - Space
The room or workspace being reserved. - Teams Meeting
Optionally create a Microsoft Teams meeting link. - Description
Additional details about the meeting. - Public or Private
If marked as Private, the organizer’s name and meeting subject will be hidden on room displays and public lists. - Comments
Optional notes or instructions. - Visual
Upload an image that may be shown on room panels or digital signage. - Additional Services
Add extra services (e.g., catering, equipment).
Setting Reminders
You can set reminders for a meeting by clicking the Reminders button. Reminders can be created for the meeting’s start time, end time, and check-in.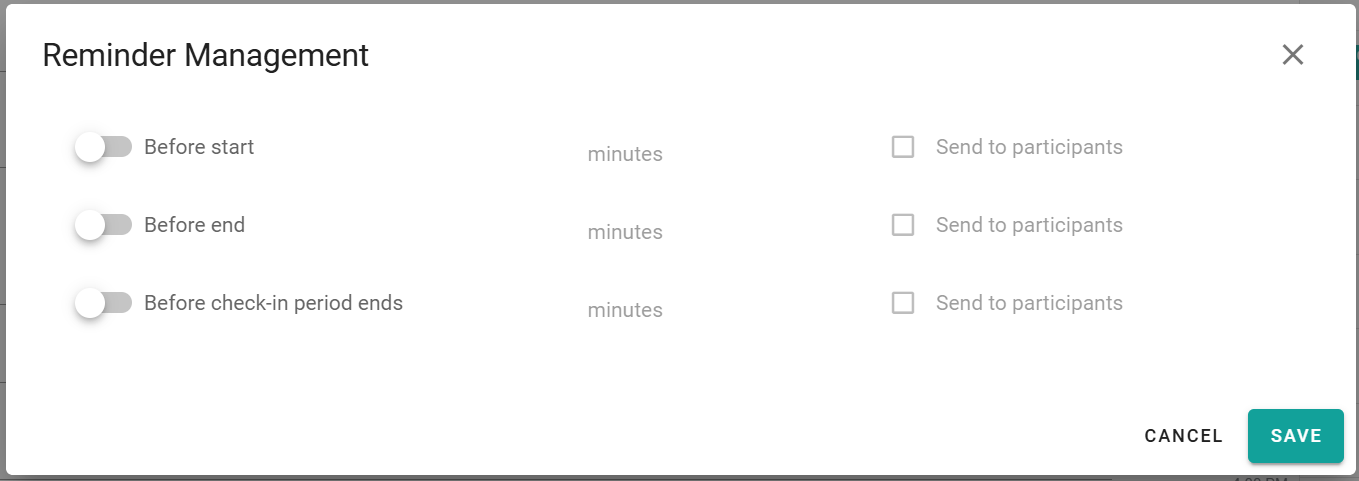
All participants will receive an email notification informing them of the invitation. Adding External Visitors You can also invite external visitors:
- This function is connected to the PADS4 Visitor Management System (VMS).
- External visitors will receive a QR code to use at the reception kiosk for easy check-in.
- Visitors can self-register upon arrival, and hosts will be notified.
- Departure can also be registered when the visitor leaves.
- Click the “+” button under the visitor section.
- Fill in the required information.
- Click Save to confirm.
Adding Additional Services
To request services like catering, AV support, etc.:- Click “Add Additional Services”.
- Choose from the available options.
- Specify quantities and, if needed, include a comment.
- Click Confirm to attach services to the reservation.