The user provisioning is the process of automatically creating, updating, and removing users accounts. It ensures that the users get the right access when they join, change roles, or leave the organization.
To enable user provisioning, our system uses SCIM standard which provides a consistent and automated way to create, update, and deactivate users.
In order to setup the user provisioning, you will have to create an identity provider following the SSO configuration instructions in this document, enable the SCIM option on it and then setup the SCIM configuration on the external identity provider.
1. Enable SCIM on PADS4 identity provider
While you are configuring your PADS4 identity provider, you have the possibility to enable a SCIM Provisioning option.
To enable it, while creating the identity provider :
- Click on “SCIM Provisioning” step
- Click “Enable SCIM Provisioning”
Once you enabled it, please/ieep the following data:
- SCIM URL
- SCIM Access Token
Those values will be reused later while configuring the SCIM Provisioning on the external identity provider side.
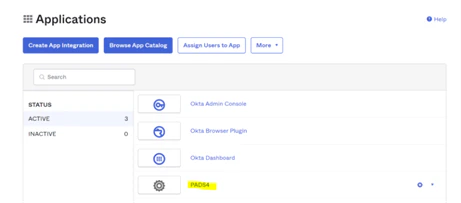
On Okta, the user provisioning feature can be enabled on the same application you did previously created for the SSO.
Create the provisioning configuration
- Open the application you created previously for the SSO Configuration
- Click on the “General” tab and then click on the “Edit” button from the “App settings” panel
- Check the “SCIM” option on the “Provisioning” field
- Click “Save”
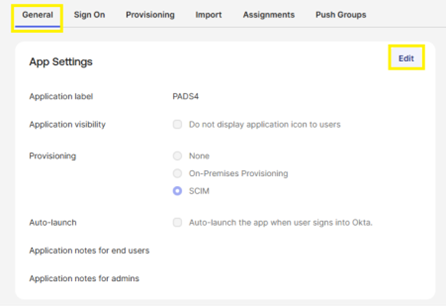 Once the option is saved, a new “Provisioning” tab should be available at the top.
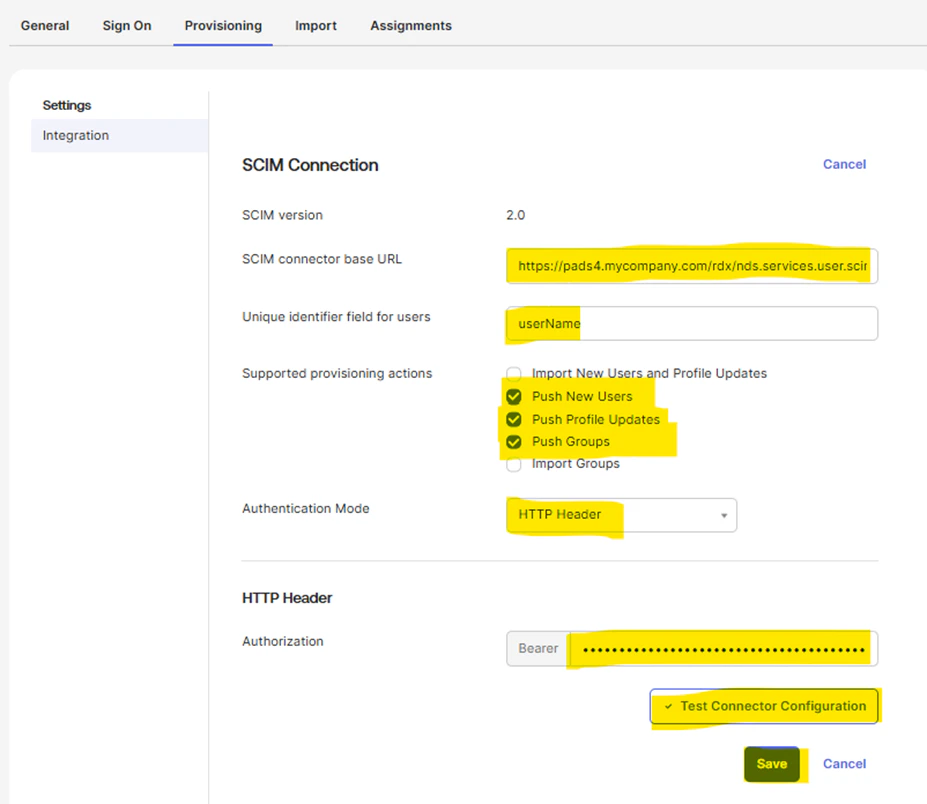
- Click on the “Provisioning” tab
- Click on the “Edit” button and enter the following information :
- SCIM Connector URL – Here you will need to fill in the url that was given on the PADS4 identity provider as “SCIM URL” (e.g. https://pads4.mycompany.com /rdx/nds.services.user.scim/api/v1/scim)
- Unique identifier field for users – This will defined the unique identifier that will be the reference between Okta and PADS4. Default is “username”
- Supported provisioning actions – Click on the following actions
- Push new users
- Push profile updates
- Push groups
- Authentication Mode – Select “HTTP Header”
- HTTP Header
- Authorization – Here you will need to fill in the token that was given on the PADS4 identity provider as “SCIM Access token”
Attention: This SCIM Connector URL must be publicly accessible because Okta uses it as a callback for user provisioning.
- Then click on “Test Connector Configuration” to ensure the configuration is ok
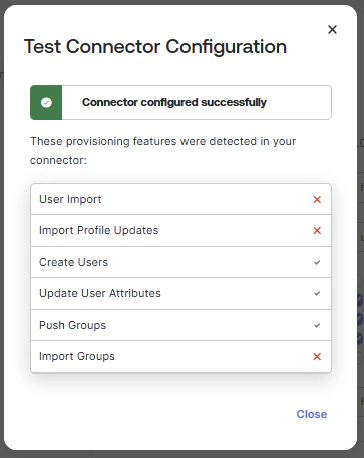
- If the test is ok, then click on the “Save” button to apply this configuration
 Once you saved the integration configuration, new left tabs should be available
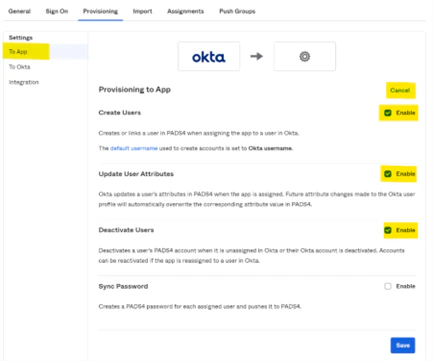
- Click on the “To App” tab and click on the “Edit” button on the “Provisioning to App” section
- Check “Enable” checkboxes for the following sections:
- Create users
- Update user attributes
- Deactivate users
- Click on the “Save” button to apply the changes
 The user & group mapping are already configured by default when the application is created but you can just ensure you at least have the following attributes mapped on your application:
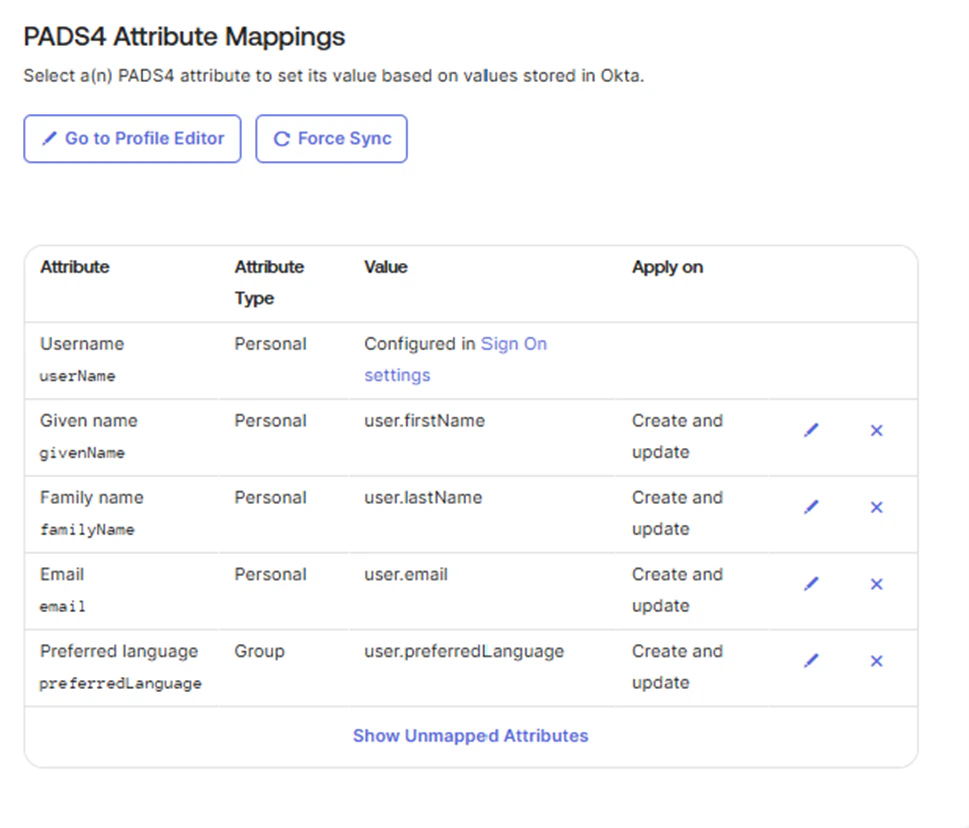
- (Optional) Add optional attributes
You can also add some optional attributes that are defined by PADS4
To use them, you will have to click on “Add New Mapping” again for each of those attributes and setup those.
Currently, the optional attributes available are:
| Target attribute | Comment |
|---|
| nfc | This property will be used to synchronize any value filled in the NFC property of PADS4 User |
Assign allowed group to access the application
On Okta, you will have to define which group members will be synchronized with the application.
This is configured the same way as the Single Sign-on configuration and the user groups already defined for the SSO will already be applied to this configuration.
If you need to extend this user group list, please follow those instructions in the respective SSO article at part: Assign user groups to the application 