1. Enable SCIM on PADS4 identity provider
While you are configuring your PADS4 identity provider, you have the possibility to enable a SCIM Provisioning option. To enable it, while creating the identity provider :- Click on “SCIM Provisioning” step
- Click “Enable SCIM Provisioning”
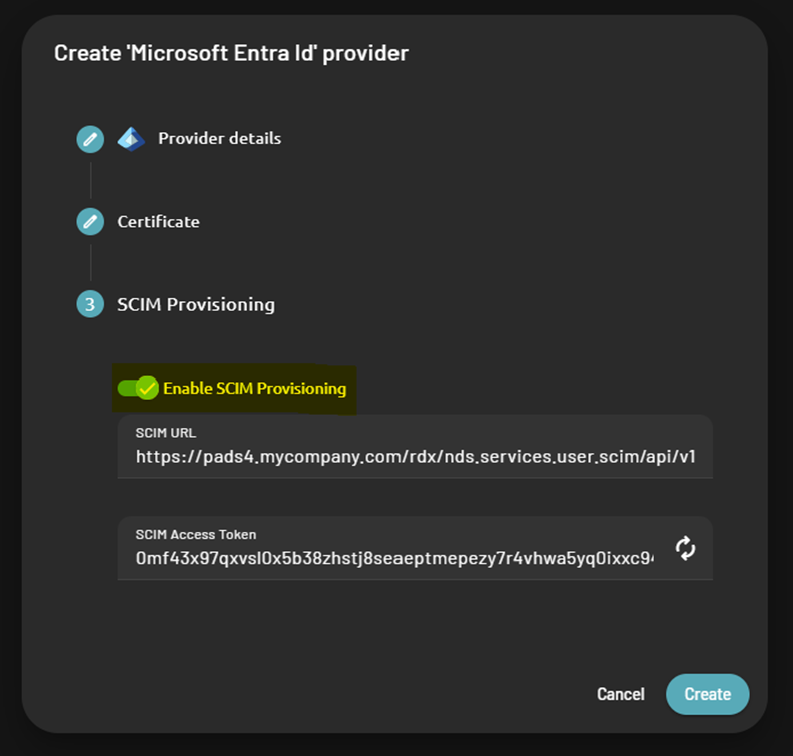
- SCIM URL
- SCIM Access Token
2. Configure SCIM on external identity provider
Now that SCIM Provisioning is enabled on PADS4, you will need to setup the user provisioning SCIM configuration on the external identity providerMicrosoft Entra identity provider
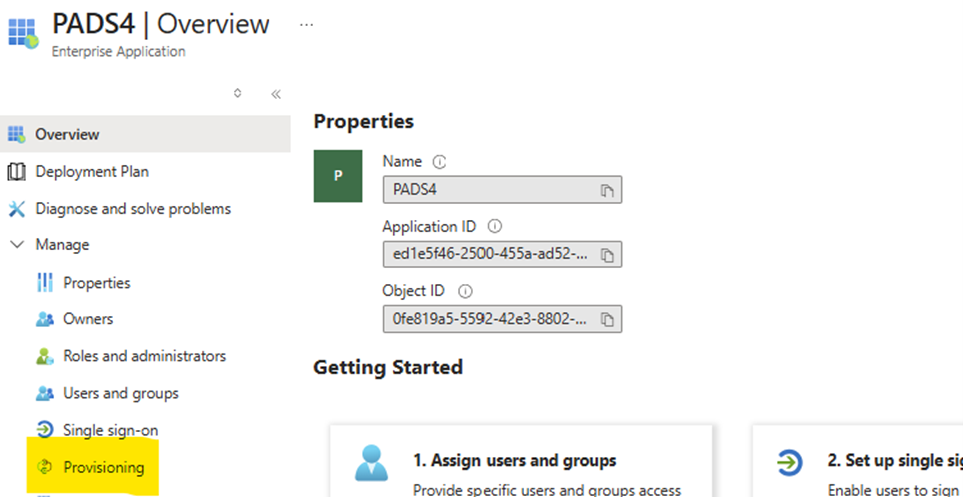
On Microsoft Entra, the user provisioning feature can be enabled on the same application you did previously created for the SSO.- Open the enterprise application you previously created
- On the left menu, click on “Provisioning”
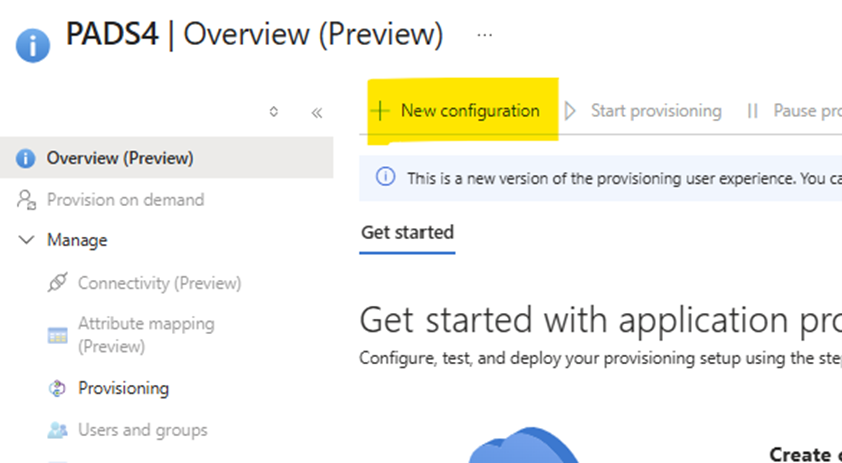
- On the overview page just opened, click on “New Configuration”
Create the provisioning configuration
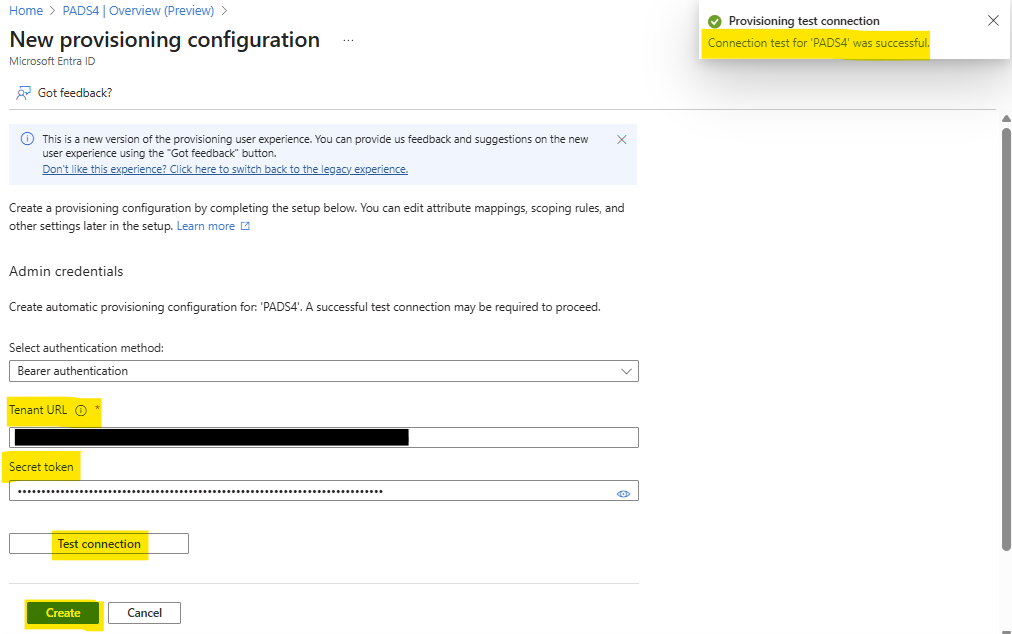
- On this new configuration page, you will have to fill some information :
- Authentication method – PADS4 does uses Bearer authentication for SCIM so select “Bearer authentication”
- Tenant URL – Here you will need to fill in the url that was given on the PADS4 identity provider as “SCIM URL” (e.g. https://pads4.mycompany.com /rdx/nds.services.user.scim/api/v1/scim)
- Secret Token – Here you will need to fill in the token that was given on the PADS4 identity provider as “SCIM Access token”
- Click on “Test connection” to ensure the connection is OK
- Then if the connection is ok, you can click on the “Create” button
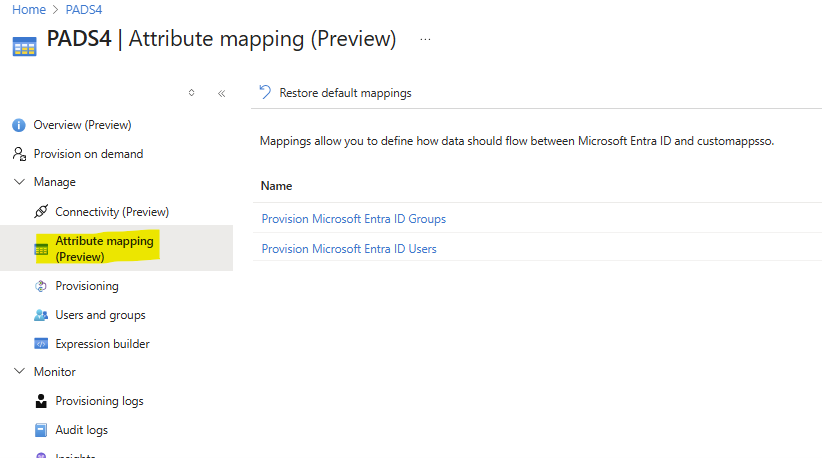
Configure user & group mapping
Now the user provisioning configuration is done, the user & group mapping need to be configured.- On the menu of Provisioning page, click on “Attribute mapping”
- Setup the group mapping configuration
The group mapping is by default configured as expected, you can just ensure the following settings are applied.

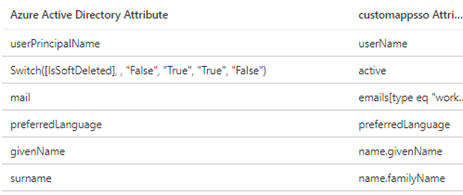
- Setup the user mapping configuration
- The user mapping should be configured as below per default.

- From the initial configuration, the attributes that can be kept are the following ones
- All non-existing mapped attributes can be deleted.
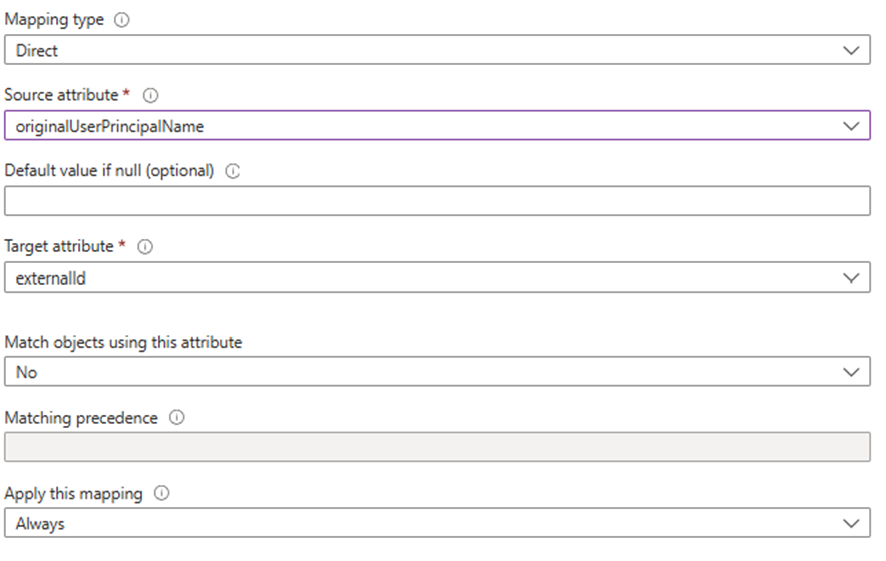
- Add the new externalId custom attribute
- When all non-existing attributes are deleted, click “Add New Mapping” button and fill the following information to create the externalId attribute
- (Optional) Add optional attributes
| Target attribute | Comment |
|---|---|
| NFC | This property will be used to synchronize any value filled in the NFC property of PADS4 User |
- Click save to save the user mapping configuration
Assign allowed group to access the application
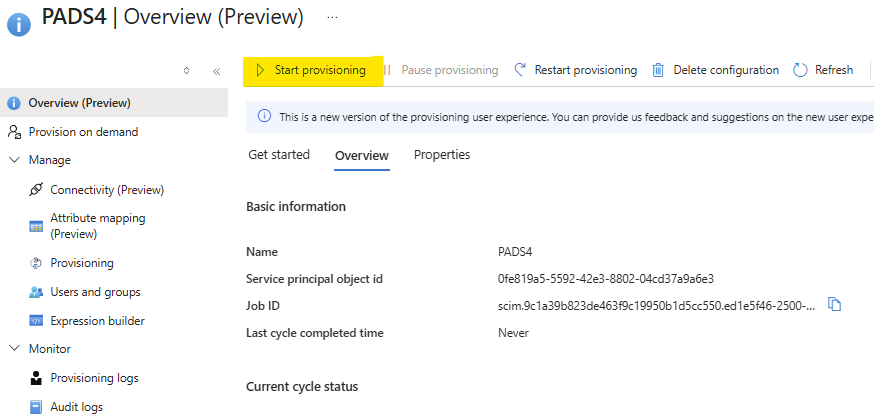
On Microsoft Entra, you will have to define which group members will be synchronized with the application. This is configured the same way as the Single Sign-on configuration and the user groups already defined for the SSO will already be applied to this configuration. If you need to extend this user group list, please follow those instructions in the respective SSO article at part: Assign user groups to the applicationStart the provisioning service
Now the provisioning configuration is done on both Microsoft Entra (Azure) and PADS4, and the groups has been assigned to the application, the provisioning service can be started. To start it , go to provisioning tab on the left menu and click on the “Start provisioning” button.