1. Accessing the PADS4 CTRL Center
To begin:- Open your web browser.
- Navigate to the PADS4 server URL (either a DNS name or IP address).
- Log in using an Administrator account.
- Click on Home.
- Use the Toggle Sidebar button at the top-left of the screen.
- Navigate to Credentials.
- Then select Providers.
2. Create the Okta application
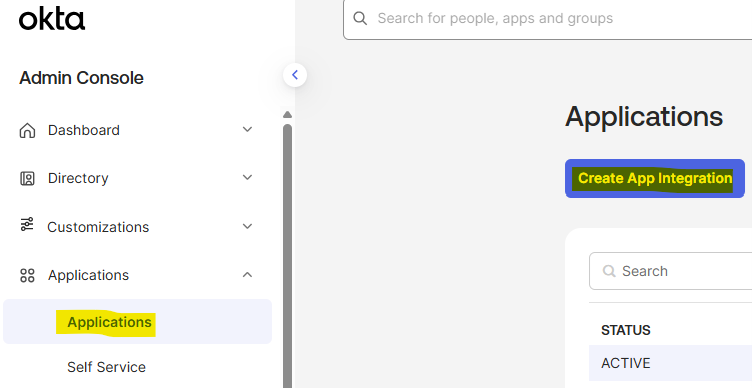
To configure an Okta identity provider, you will need to connect to Okta as an Administrator and create a new okta app integration.- On Okta, go to Applications page
- Click on “Create App Integration”
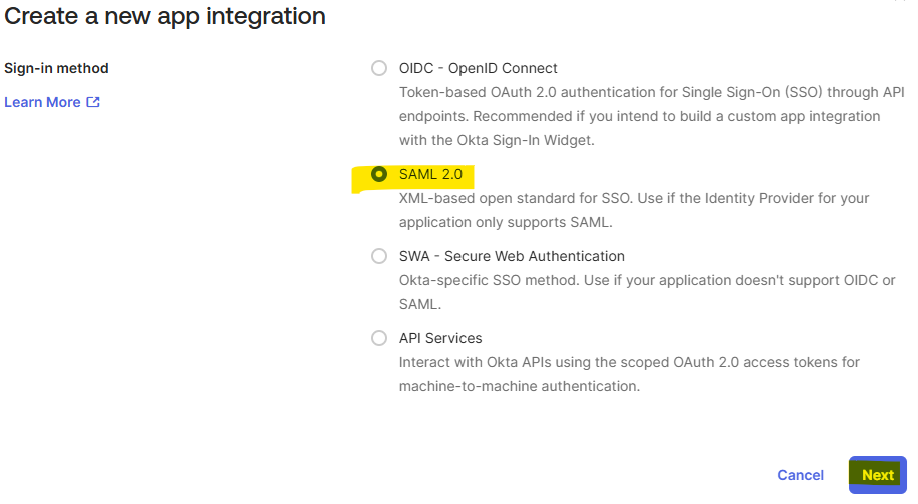
- Select “SAML 2.0” sign-in method and click “Next”
- Fill in the information requested in the from and click “Next”
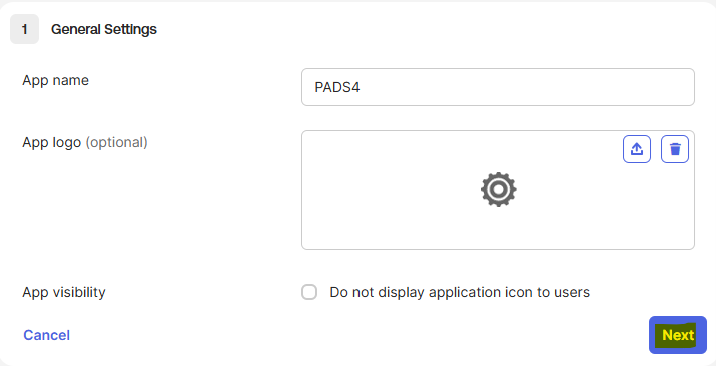
- Name: PADS4
3. Setup SAML 2.0 configuration
- Edit the SAML Settings configuration
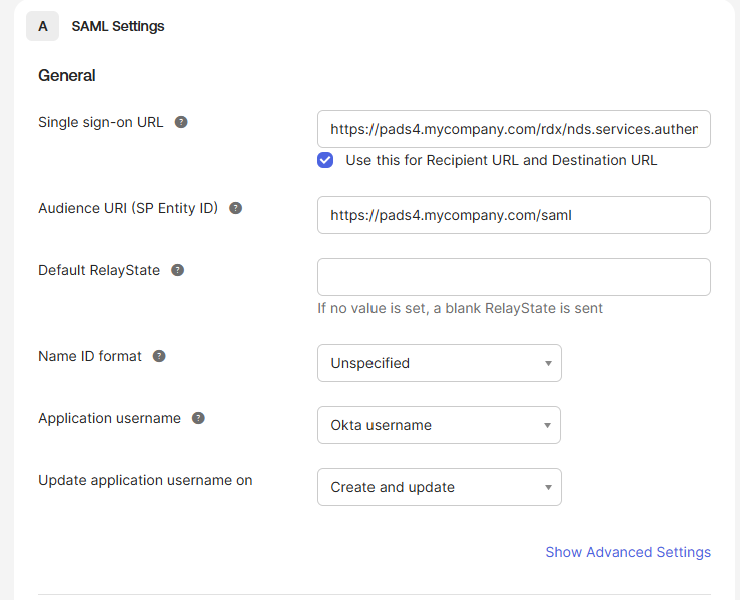
Make sure the values “Single sign-on URL” and “Audience URI (SP Entity ID)” have the structure as described below or the configuration will not work.
- Single sign-on URL:
- local pads4 url with /rdx/nds.services.authentication.integration/api/v1/pads/Saml2/Acs
- For example: https://pads4.mycompany.com/rdx/nds.services.authentication.integration/api/v1/pads/Saml2/Acs
- Audience URI (SP Entity ID):
- local pads4 url with /saml
- For example: https://pads4.mycompany.com/saml
If the domain of your pads4 instance is different than “pads”, you must update the domain with your own domain name. (e.g : for a domain named “domaineone”, the url will be https://pads4.mycompany.com/rdx/nds.services.authentication.integration/api/v1/domainone/Saml2/AcsYour configured domain name can be verified by logging in with your su\root account and go to the “Domains” section: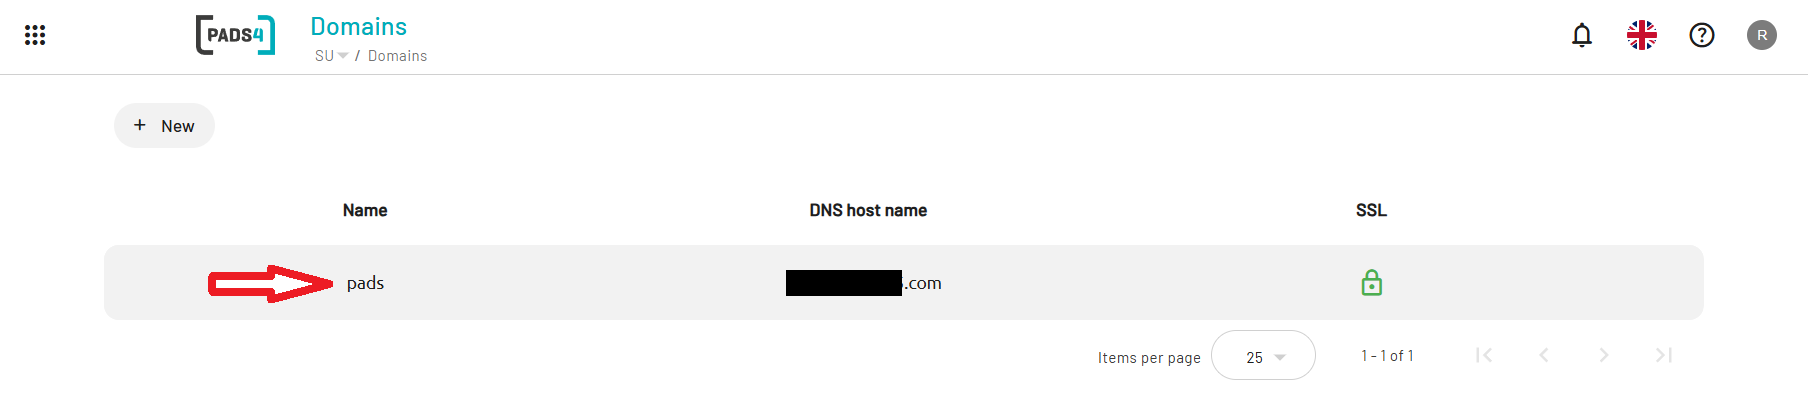
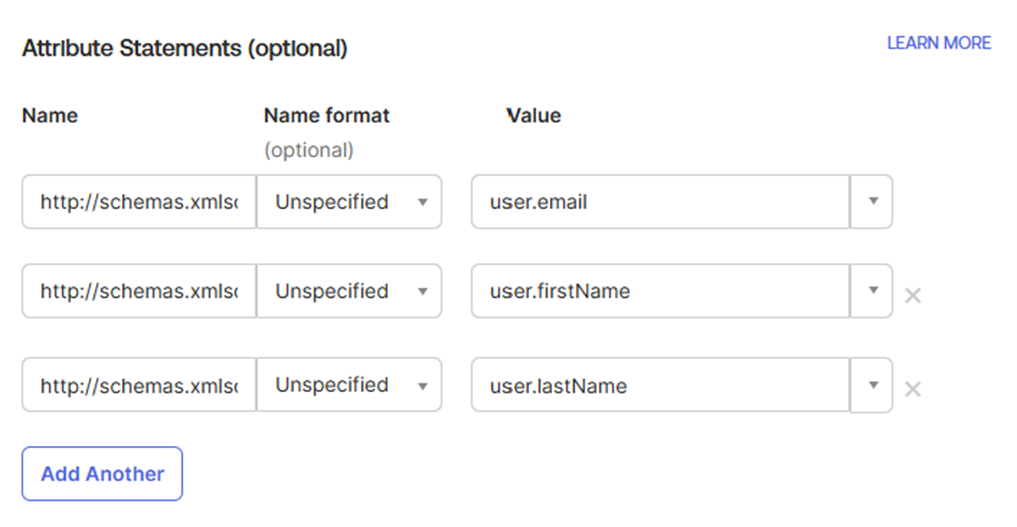
4. Attributes & claims
- Edit the attributes and claims to match the values below
| Name | Name format | Value |
|---|---|---|
| http://schemas.xmlsoap.org/ws/2005/05/identity/claims/emailaddress | Unspecified | user.email |
| http://schemas.xmlsoap.org/ws/2005/05/identity/claims/givenname | Unspecified | user.firstName |
| http://schemas.xmlsoap.org/ws/2005/05/identity/claims/surname | Unspecified | user.lastName |
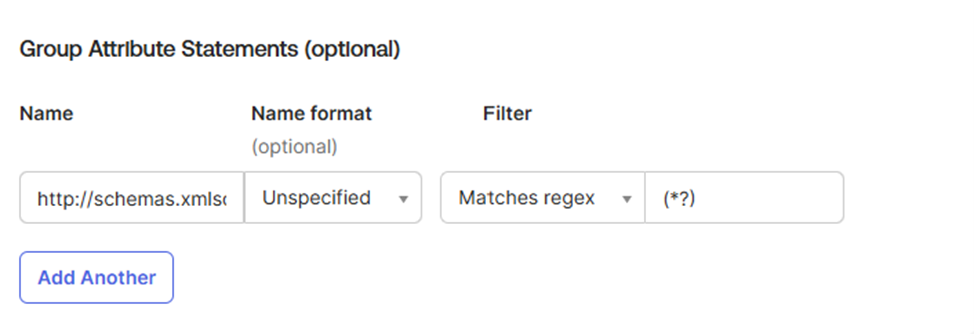
- For the group attribute, please follow the configuration below and ensure the filter is set on the “Matches regex” option.
| Name | Name format | Filter | Value |
|---|---|---|---|
| http://schemas.xmlsoap.org/claims/group | Unspecified | Matches regex | (*?) |
- Click on the “Next” button
- Then click on the “Finish” button to create the app integration
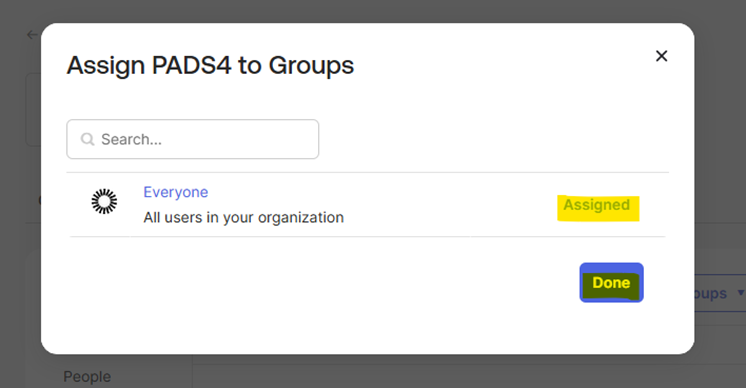
5. Assign user groups to the application
To define which user groups will have access to the application, you will need to assign the expected user groups to the application.- On the application you just created, on the top menu, click on the “Assignments” item
- Click on the “Assign” button and then click on “Assign to groups”
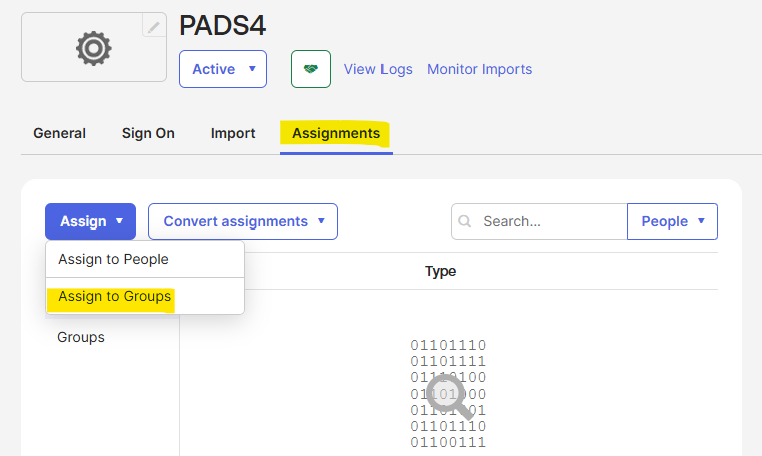
- Click “Assign” on any groups you want to assign to the application and click on “Done”
6. Collection configuration data required for creating the identity provider in PADS4
In order to create the identity provider in PADS4, you will need to collect some information on your newly created Okta Entra identity provider that will allow you to configure the provider in PADS4. For this you will need to click on the “Sign On” tab of your created app and follow the instructions below:- Go to the “Sign On” app
- On the SAML 2.0 panel, click on the “More details” button
- Collect the following information:
| Req. info | Example |
|---|---|
| Metadata URL | https://myokta.okta.com/app/xxxxxxxxxxxx/sso/saml/metadata |
| Sign on URL | https://myokta.okta.com/app/xxxxxxx/xxxxxxxxxxxx/sso/saml |
| Signing certificate | okta.cert |
7. Configuring the provider in PADS4
With the information configurated and retrieved above you will be able to configurate the Okta integration in PADS4.- Login to the PADS4 Web Portal of your PADS4 instance with an account that has atleast the PADS4 System Management license.
- On the Dashboard open the left menu and browse to “Credentials” at the bottom left.
- Now click on “Providers” followed by “New”
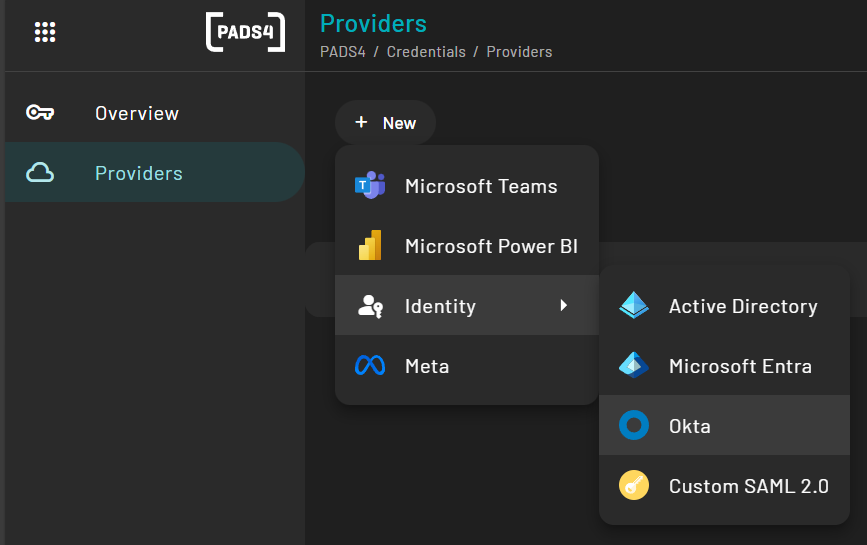
- Open the Okta configuration menu

- Name: Represent the name of your provider in PADS4 (can be any value)
- Indentifier: Represent the “Issuer” value collected in step 6.
- Reply URL: Represent your local pads4 FQDN
- Example: https://pads4.mycompany.com
- Metadata URL: Represent the “Metadata URL” collected in step 6
- Indentifier and Assertion Consumer Service URL will be filled in automatically.
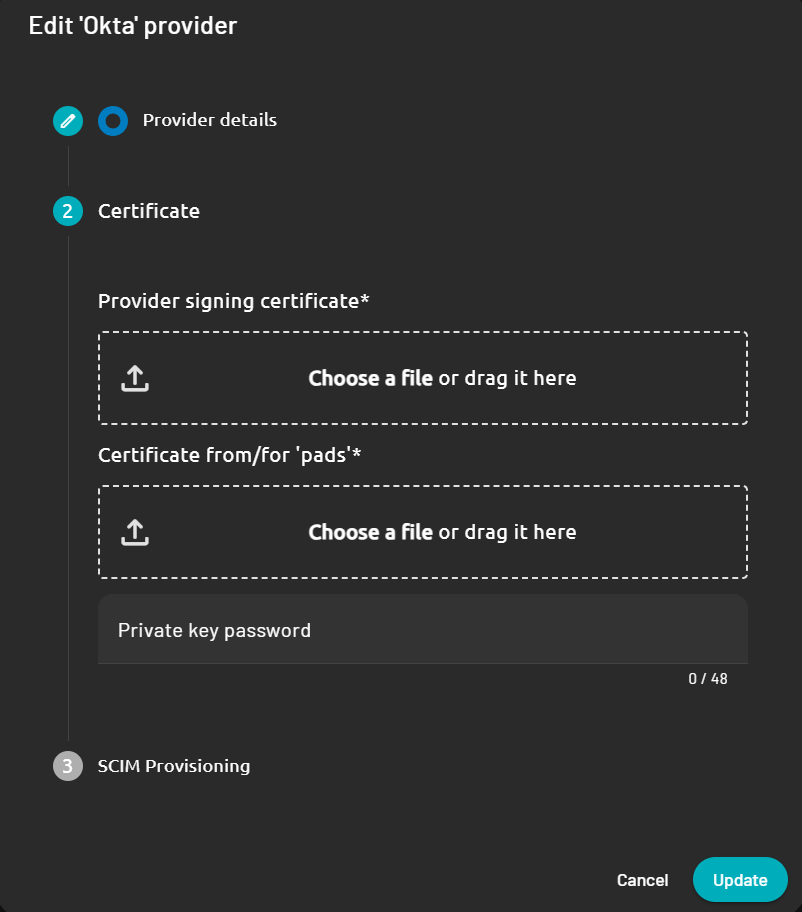
- Provider signing certificate: Upload the Okta signing certificate retrieved in step 6.
- Certificate from/for “domainone”: Upload any certificate (.PFX) you want to sign assertions from PADS4 to the external identity provider.
- Private key password: Fill in the password that relates to the PFX certificate used above.