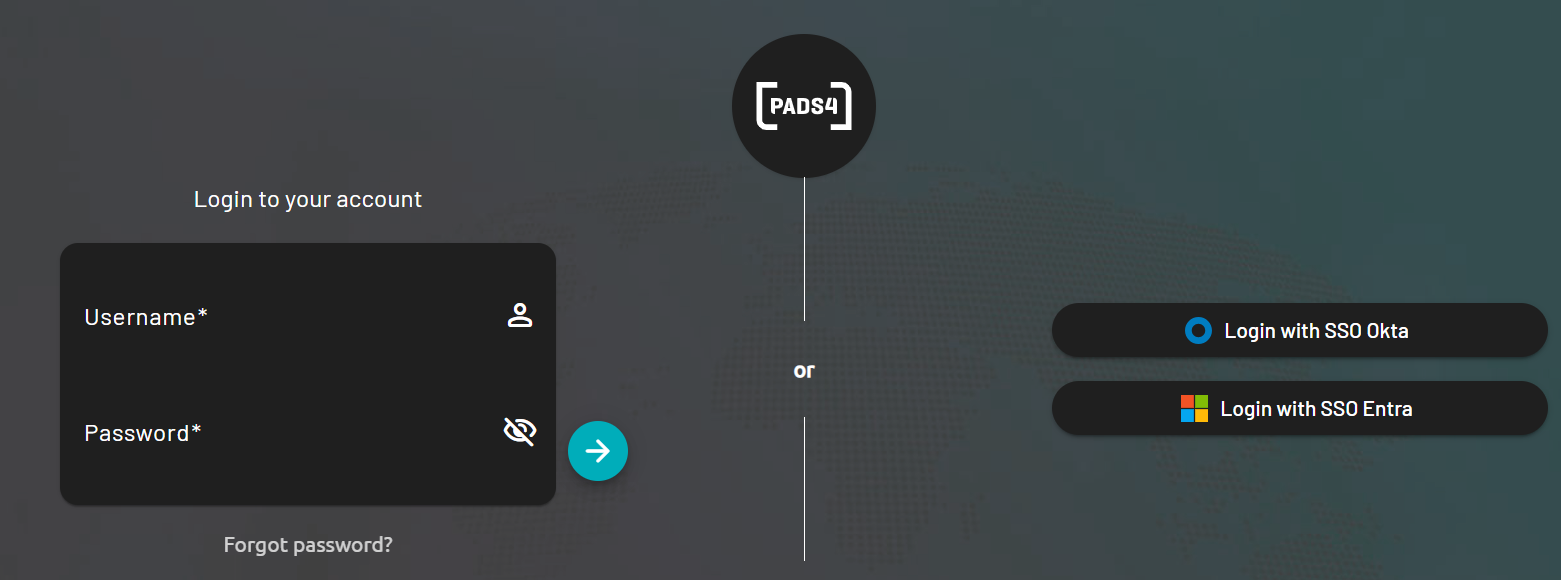

Create a Microsoft Azure enterprise application
To configure a Microsoft Entra identity provider, connect to Azure as an administrator and create a new enterprise application.- Go to https://portal.azure.com and sign in as an administrator.
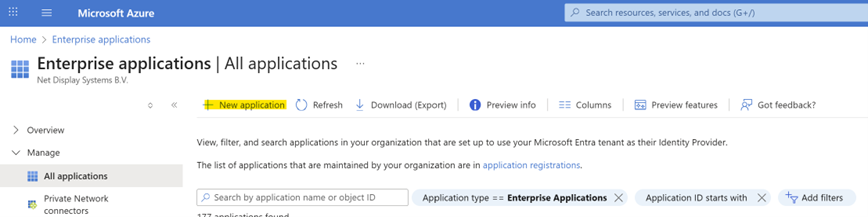
- On Azure, go to the Enterprise applications page.
-
Click New application.
-
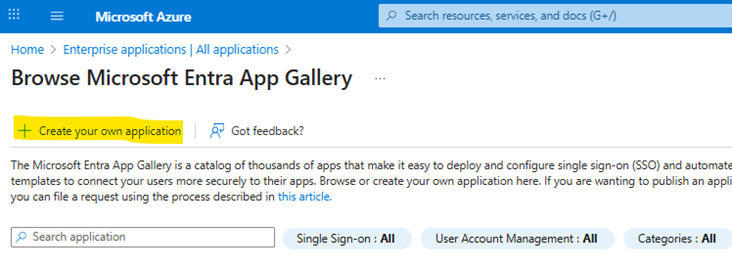
Click Create your own Application.
-
Fill in the information requested in the form. For example, you can use PADS4.
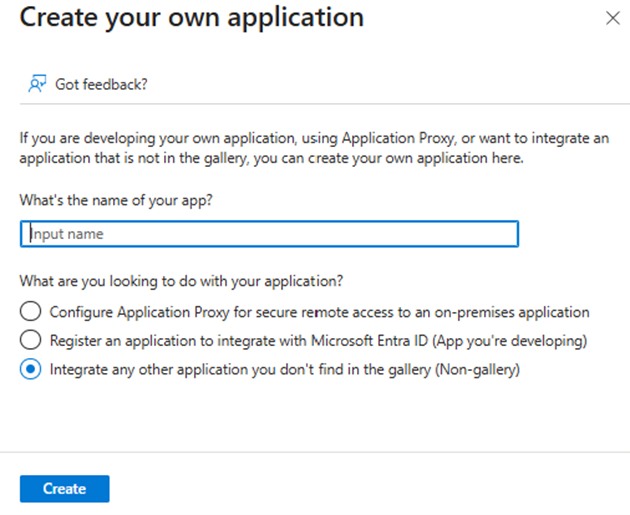
- Click the Create button.
- Azure creates your application.
Set up single sign-on configuration
After Azure creates your application, enable and configure single sign-on.-
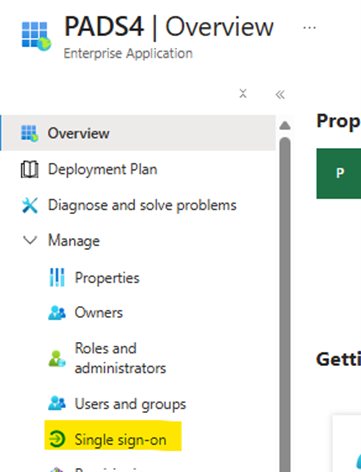
In the left menu, click Single sign-on.
-
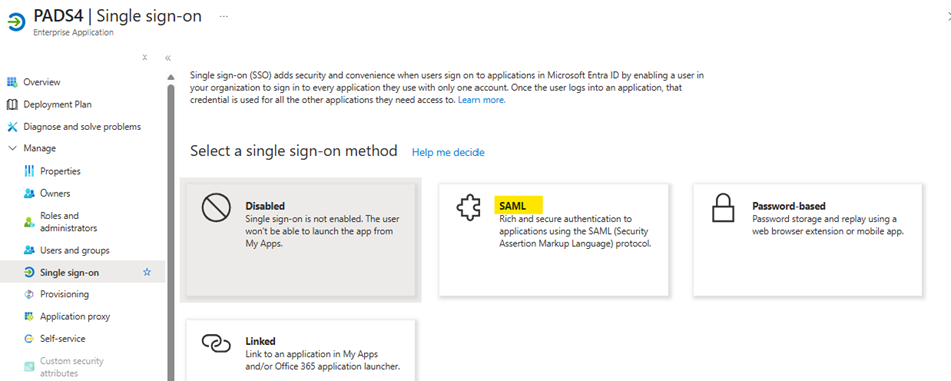
Select SAML as the single sign-on method.
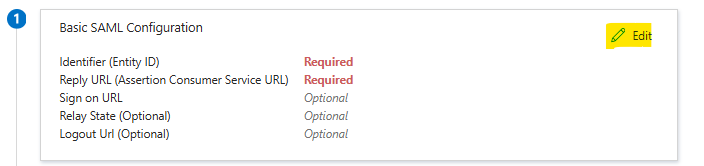
- For the Identifier, use the PADS4 server address and add /saml (e.g., https://pads4.mycompany.com/saml).
- For the Reply URL, use the PADS4 server address and add /rdx/nds.services.authentication.integration/api/v1/pads/Saml2/Acs (e.g., https://pads4.mycompany.com/rdx/nds.services.authentication.integration/api/v1/pads/Saml2/Acs).
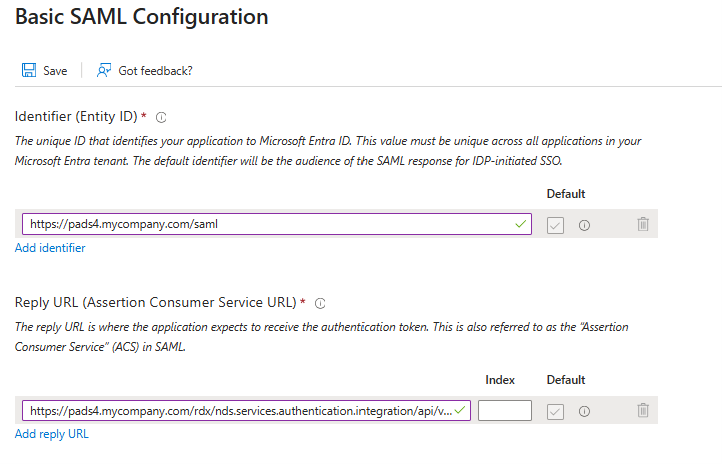
- Click Save to apply the changes.
Edit attributes & claims
-
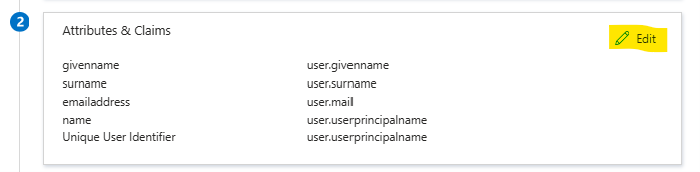
To edit the Attributes & Claims, click Edit.
-
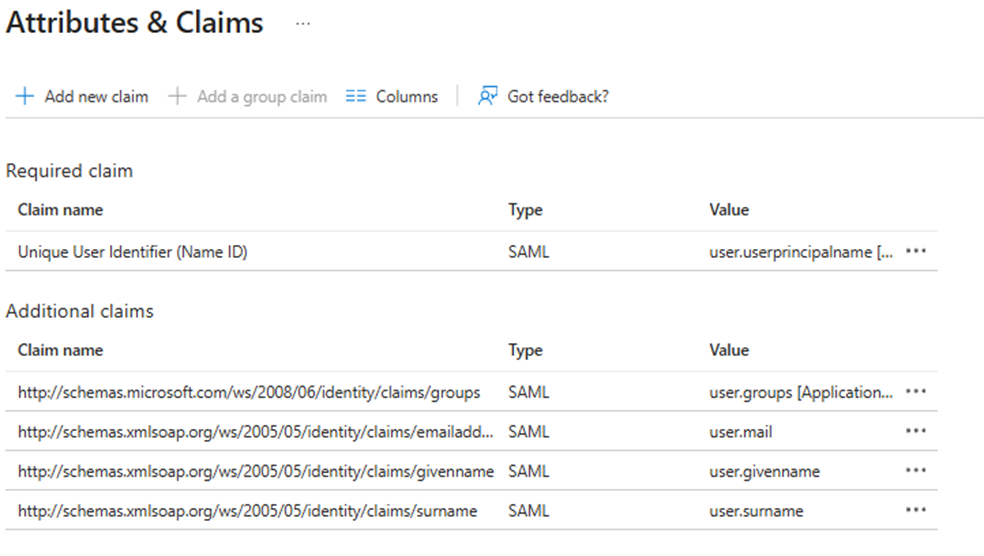
Edit the Attributes & Claims.
Create the group claim
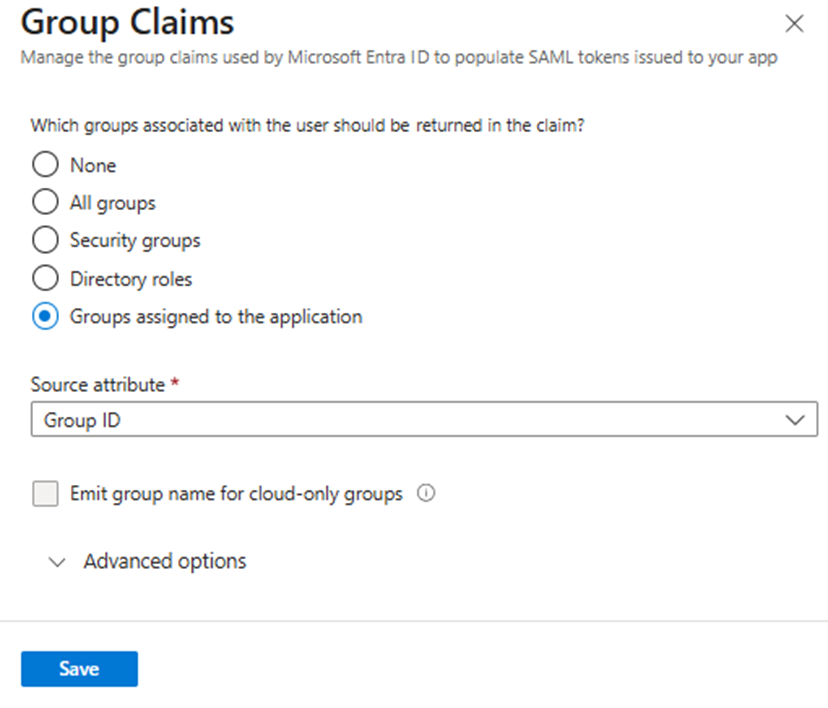
To map Microsoft Entra groups to PADS4 roles, configure the group claim:- Click Add new group claim.
- Select Groups assigned to the application (radio button).
- Select Group ID as the source attribute.
- Click Save.
Assign users and groups
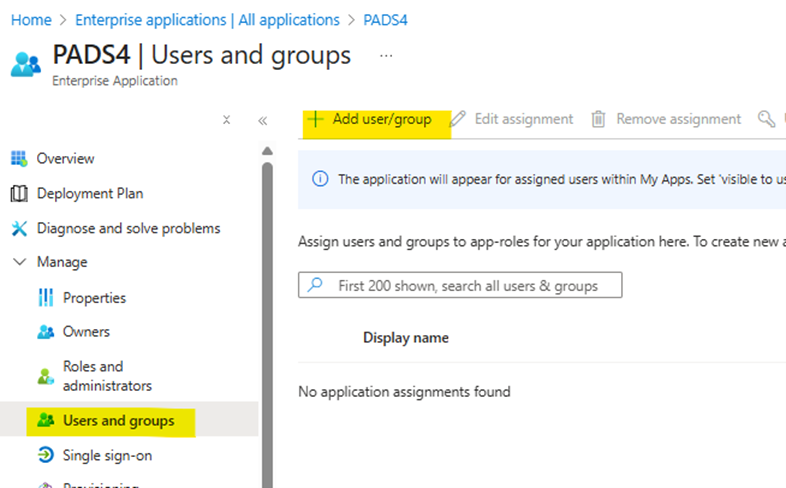
To specify which user groups can access the application, assign the appropriate user groups to it.- In the left menu, click Users and groups.
-
Click Add user/group to add a new group.
-
Click Users and groups, select the group you want to assign, and then click Select.
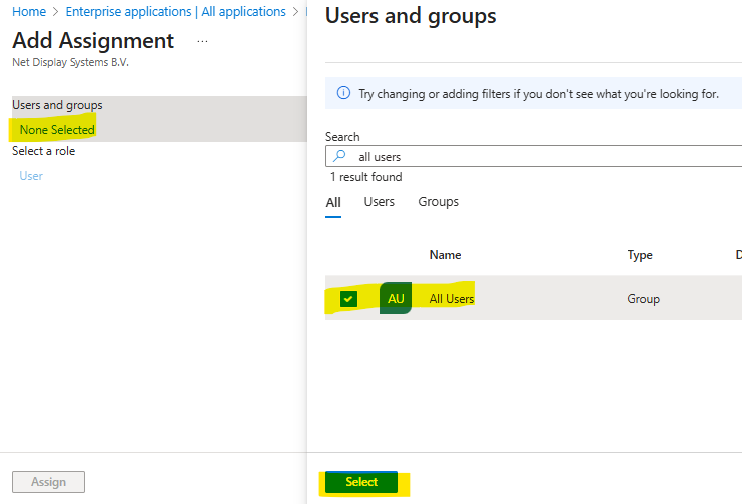
- Click Assign.
Collect configuration data for the PADS4 identity provider
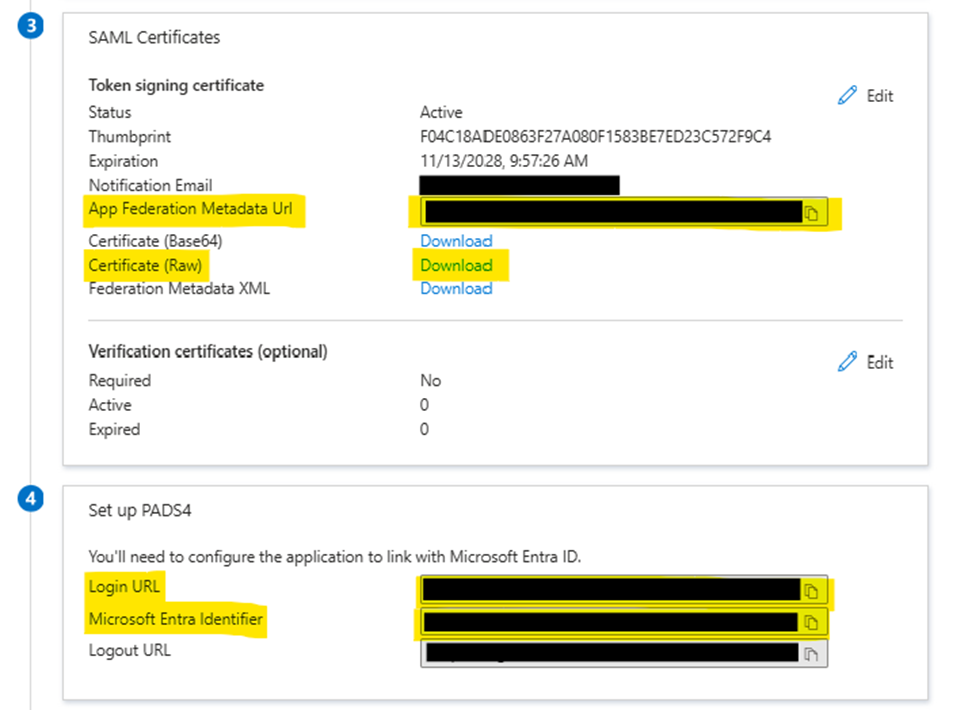
To create the identity provider in PADS4, gather these details from your Microsoft Entra configuration. Open the Single sign-on page and collect:- App Federation Metadata URL (e.g.,
https://login.microsoftonline.com/xxxxxxxx-xxxx-xxxx-xxxx-xxxxxxxxxxxx/federationmetadata/2007-06/federationmetadata.xml?appid=xxxxxxxx-xxxx-xxxx-xxxx-xxxxxxxxxxxx) - Certificate (Raw) – Click the link to download it (e.g.,
your-application-name.cer) - Login URL (e.g.,
https://login.microsoftonline.com/xxxxxxxx-xxxx-xxxx-xxxx-xxxxxxxxxxxx/saml2) - Microsoft Entra Identifier (e.g.,
https://sts.windows.net/xxxxxxxx-xxxx-xxxx-xxxx-xxxxxxxxxxxx/)
Set up the identity provider in PADS4
After creating your identity provider application, you also need to set up the corresponding identity provider in PADS4.Create the identity provider
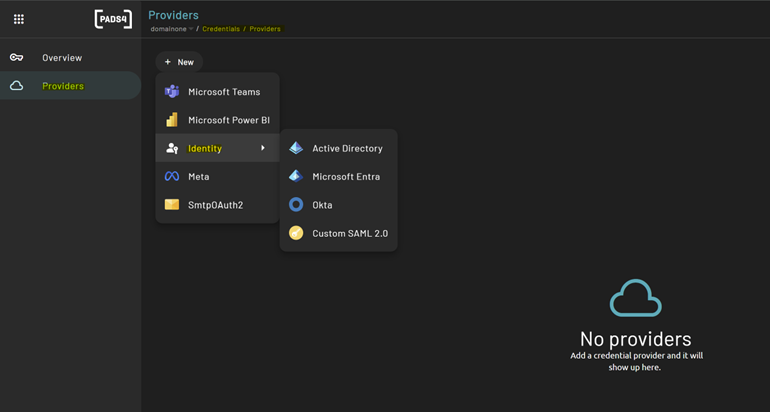
To create the identity provider:- Sign in to PADS4 and go to Administration.
- In the left menu, click Credentials.
- Click Providers.
-
Click New and select Identity and Microsoft Entra.
Fill in provider details
- Name – Enter a display name for the provider in PADS4.
- Identifier – Enter the Microsoft Entra Identifier you collected earlier.
-
Reply URL – Enter the URL of your local PADS4 application (e.g.,
https://pads4.mycompany.com). -
Metadata URL – Enter the Microsoft Entra: App Federation Metadata URL you collected.
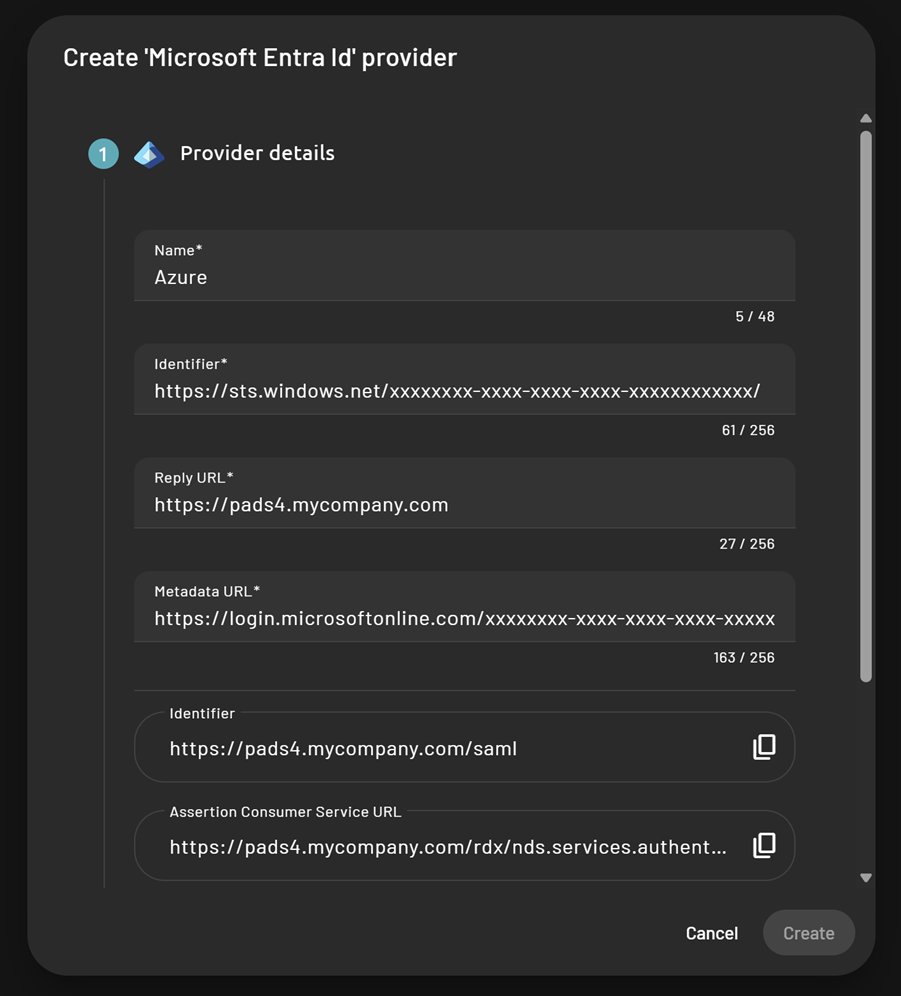
- PADS4 fills in the Identifier and Assertion Consumer Service URL.
Upload certificates
-
Provider Signing Certificate – Upload the Certificate (Raw) (
.cer) file you downloaded from your Microsoft Entra identity provider configuration. -
PADS4 Identity Provider Certificate – Upload a certificate (
.pfx) to sign SAML assertions from PADS4 to Microsoft Entra. -
Password – Enter the password for the uploaded
.pfxcertificate (below the certificate field).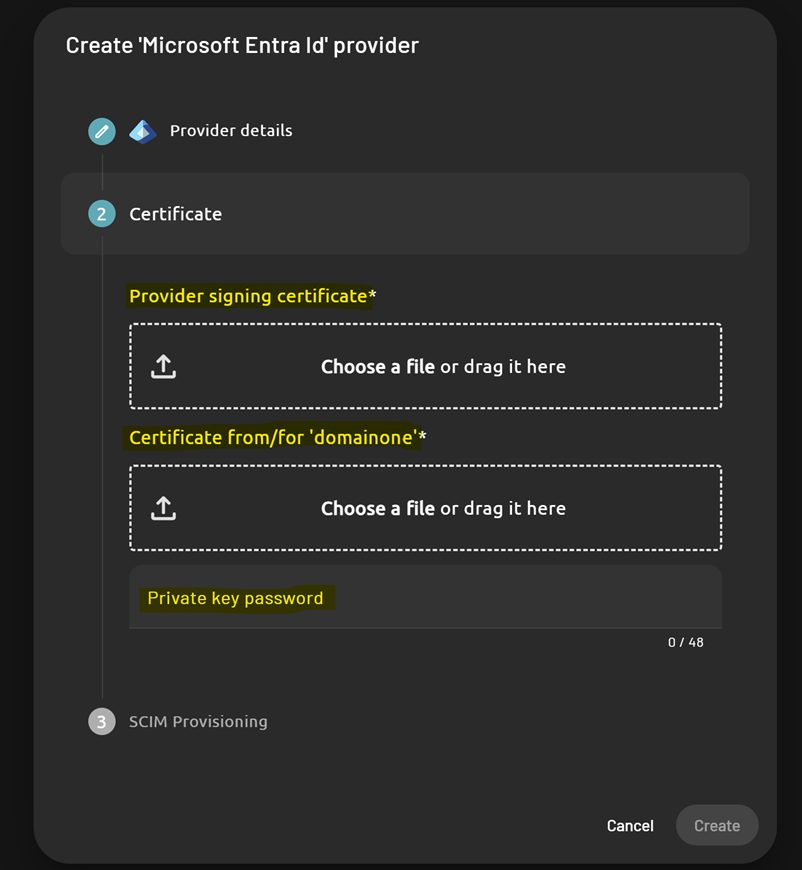
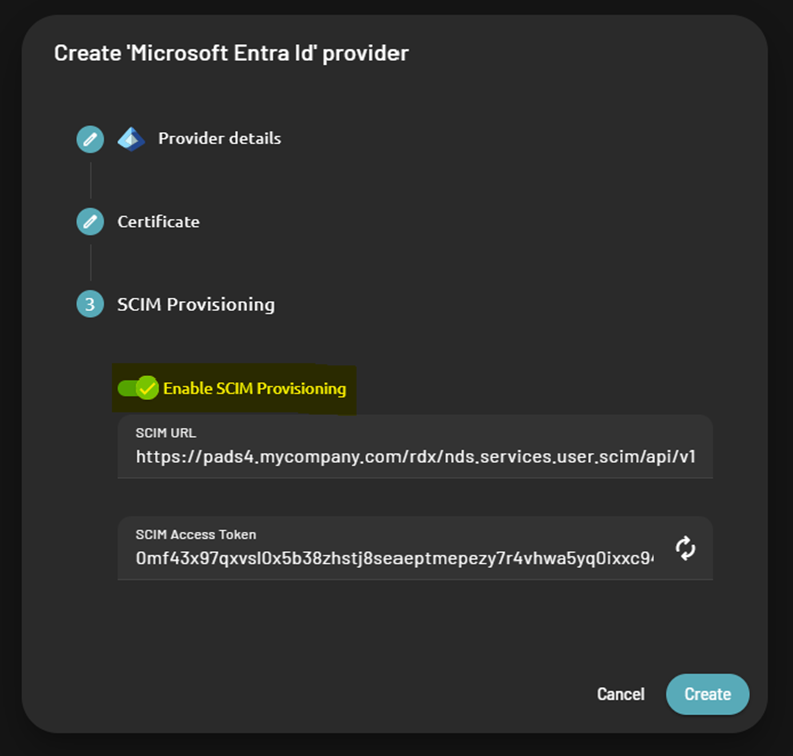
Enable SCIM provisioning (optional)
You can enable SCIM provisioning during identity provider creation. This feature synchronizes users between Microsoft Entra and PADS4, automatically creating, updating, or deleting users linked to the application. Once enabled, save these values for later use in your Microsoft Entra SCIM configuration:- SCIM URL
-
SCIM Access Token
Finalize Microsoft Entra ID setup
- Sign out and refresh the PADS4 Portal.
- The SSO Login button should now be visible.
-
Sign in using your Microsoft Entra credentials.