Before you begin
Make sure you have:- An Azure AD tenant and permission to create app registrations.
- Reviewed the Introduction for limitations that apply to the service principal approach.
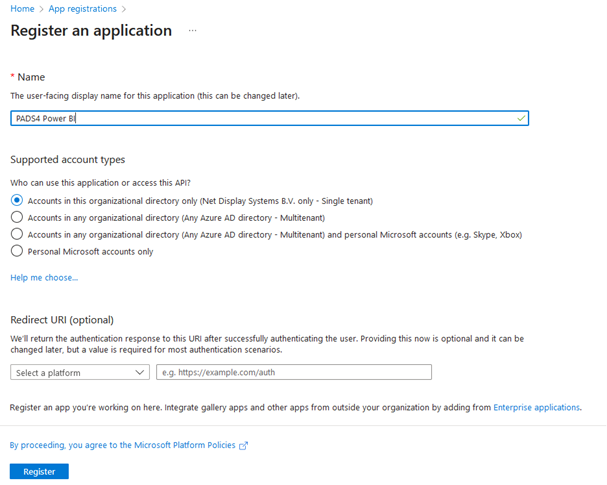
Step 1: Create the app registration
- Sign in to the Microsoft Azure Portal.
- Go to Azure Active Directory > App Registrations and select New registration.
- Configure the registration:
- Name — any reference name for the integration.
- Supported account types — select Single-tenant or Multi-tenant based on your requirements. Do not enable personal Microsoft accounts.
- Redirect URI — leave empty. Power BI integration does not require one.
- Select Register.
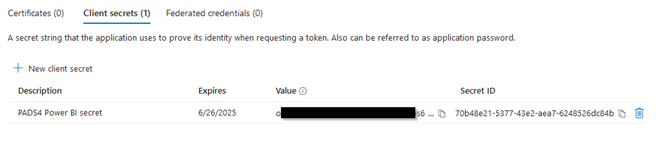
Step 2: Create a client secret
The client secret lets PADS4 authenticate to Power BI as the service principal.- In the app registration, select Certificates & secrets in the left menu.
- Open the Client secrets tab and select New client secret.
- Enter a description and choose an expiration duration.
- Select Add.
- Copy the client secret value immediately — it will not be visible again after you leave the page.
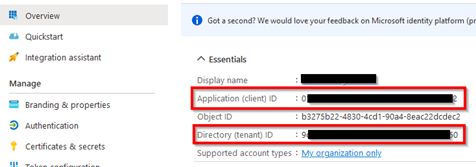
Step 3: Collect the values for PADS4 CTRL Center
Gather the following from your app registration. You’ll enter them in PADS4 CTRL Center to complete the integration.| Value | Where to find it |
|---|---|
| Application (Client) ID | App Registration > Overview |
| Directory (Tenant) ID | App Registration > Overview |
| Client secret | App Registration > Certificates & secrets |