> ## Documentation Index
> Fetch the complete documentation index at: https://docs.pads4.com/llms.txt
> Use this file to discover all available pages before exploring further.
# Google
This article requires you to have at least PADS4 version 2025.2.
This document provides step-by-step instructions for creating OAuth2 credentials for SMTP authentication using Google and Microsoft platforms. This document assumes the reader has basic familiarity with the Google Cloud Platform.
## **1. Create a Google Cloud Project**
* Navigate to the Google Cloud Console: [https://console.cloud.google.com/](https://console.cloud.google.com/)
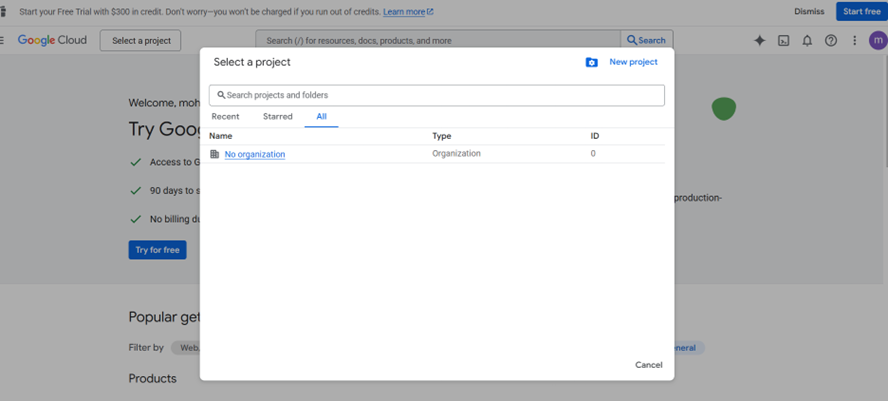
* Click on the project dropdown at the top of the page and select ‘\*\*Select a Project’ \*\*and then Click on the **‘New Project’.**
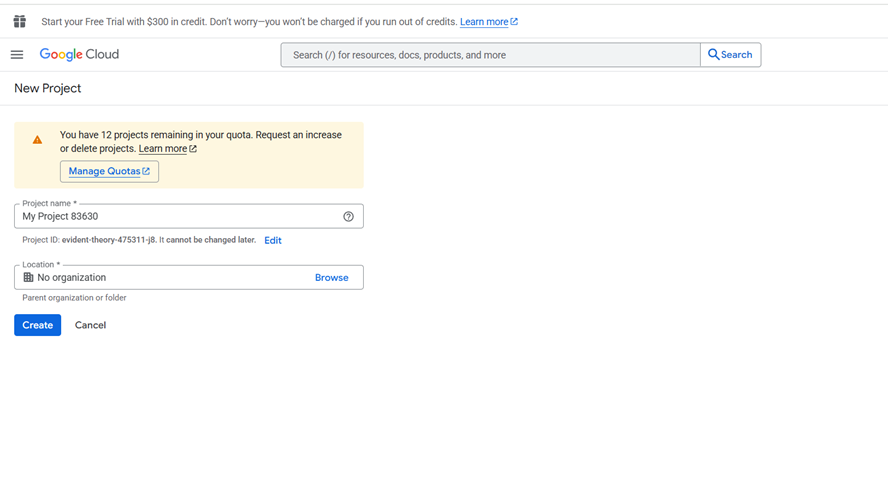
* **Project name**: Enter a descriptive name for your project
* **Location**: Select the appropriate location or leave as default
 * Click **Create** to create your project
 ## **2. Enable Gmail API**
* In your newly created project, go to **API's & Services > Library**
* Search for "Gmail API" in the search bar
## **2. Enable Gmail API**
* In your newly created project, go to **API's & Services > Library**
* Search for "Gmail API" in the search bar
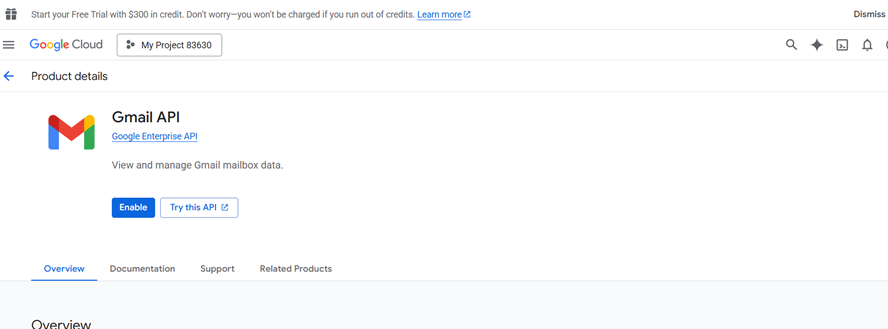
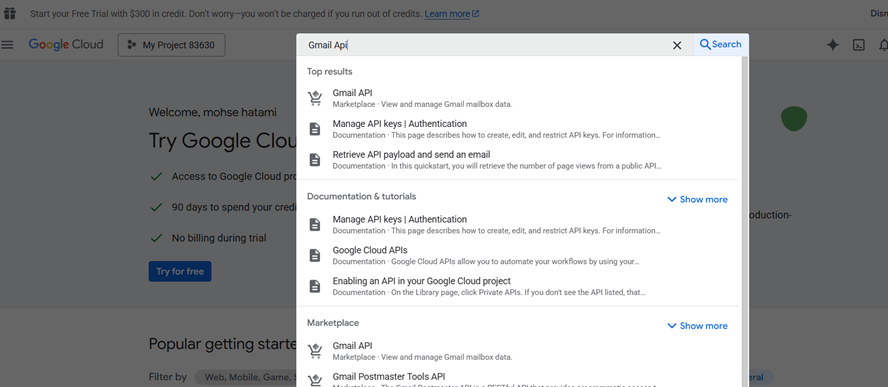 * Click on **Gmail API** from the results
* Click on **Enable** button to enable the Gmail API for your project
* Click on **Gmail API** from the results
* Click on **Enable** button to enable the Gmail API for your project
 ## **3. Configure Oauth Consent Screen**
* Navigate to **API's & Services > OAuth consent screen**
## **3. Configure Oauth Consent Screen**
* Navigate to **API's & Services > OAuth consent screen**
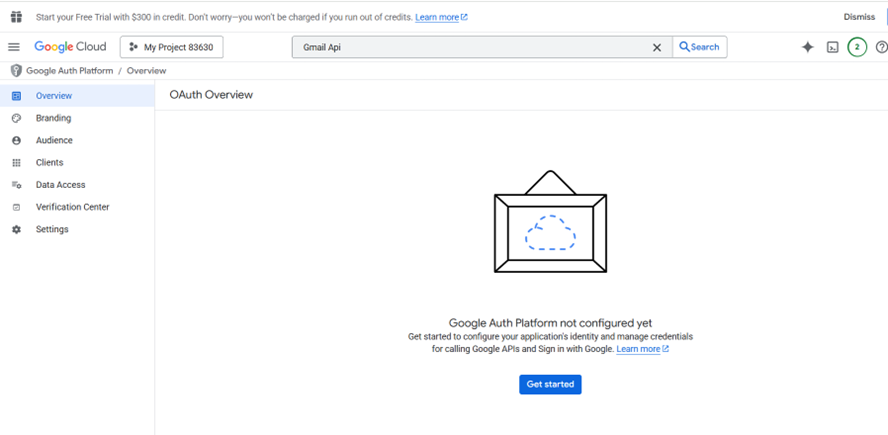 * Click **Get started**
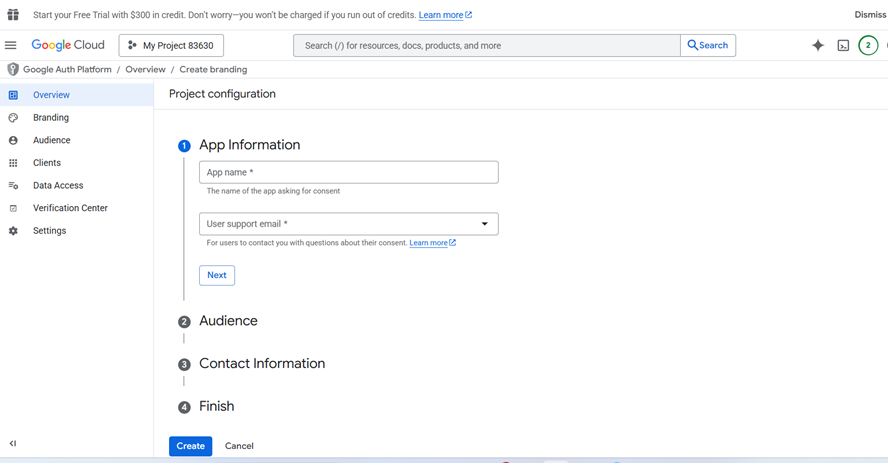
* Fill in the required app information
* Appname: Name of your application e.g **PADS4**
* User support email: Select your email address
* Developer contact information: Enter your email address
* Click **Get started**
* Fill in the required app information
* Appname: Name of your application e.g **PADS4**
* User support email: Select your email address
* Developer contact information: Enter your email address
 * Select the user type
* Internal: For Google Workspace users only ( recommended if applicable )
* External: For any Google account user
* Click **Save and continue**
## **4. Create OAuth2 Credentials**
* Go to **API's & Services > Clients**
* Select the user type
* Internal: For Google Workspace users only ( recommended if applicable )
* External: For any Google account user
* Click **Save and continue**
## **4. Create OAuth2 Credentials**
* Go to **API's & Services > Clients**
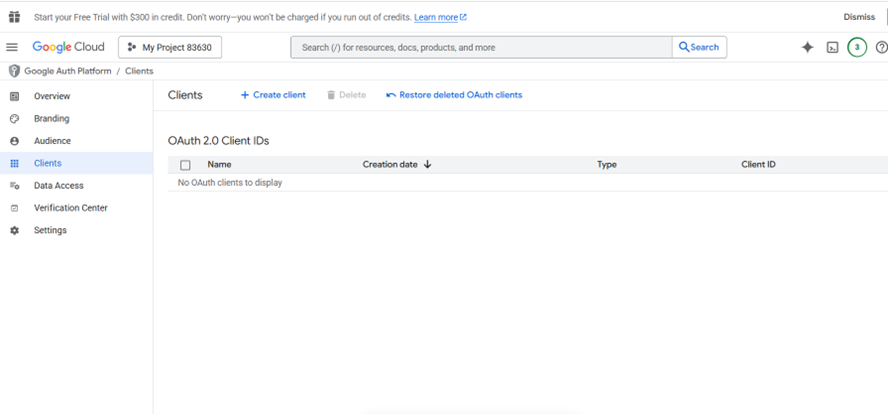 * Click on **Create client**
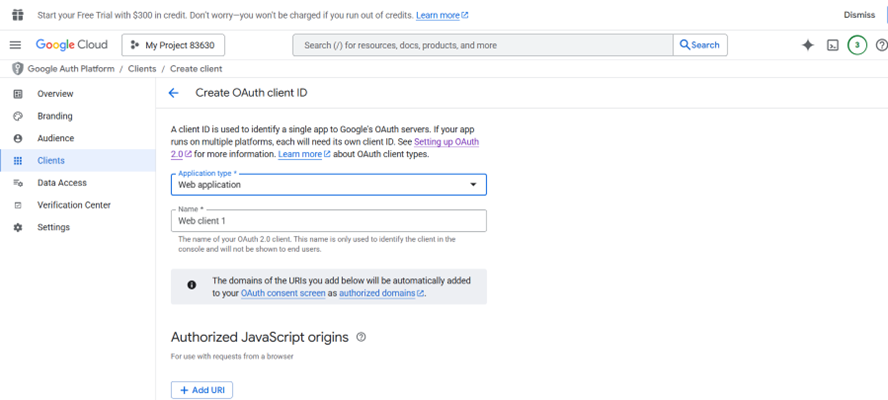
* Select **Web application** as the application type ( Web application )
* Enter a name for your OAuth client
* Click on **Create client**
* Select **Web application** as the application type ( Web application )
* Enter a name for your OAuth client
 * Under **Autherized redirect URI's**, click \*\*Add URI \*\*and enter:
* http\://\:\/credentials/generic/authorize/callback
* **Host:** DNS name or IP address of your PADS4 Web Portal
* **Port:** Optional, if the PADS4 Web Portal is not using the default ports for HTTP or HTTPS, you should specify the port number.
* Under **Autherized redirect URI's**, click \*\*Add URI \*\*and enter:
* http\://\:\/credentials/generic/authorize/callback
* **Host:** DNS name or IP address of your PADS4 Web Portal
* **Port:** Optional, if the PADS4 Web Portal is not using the default ports for HTTP or HTTPS, you should specify the port number.
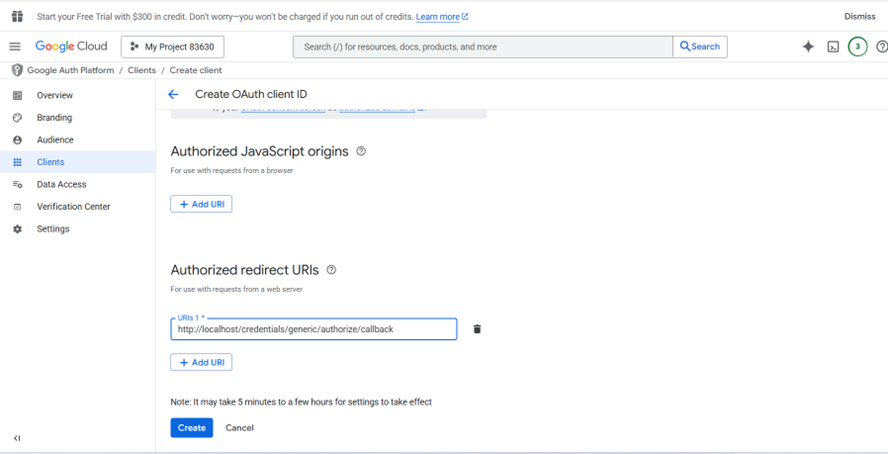 * Click on **create**
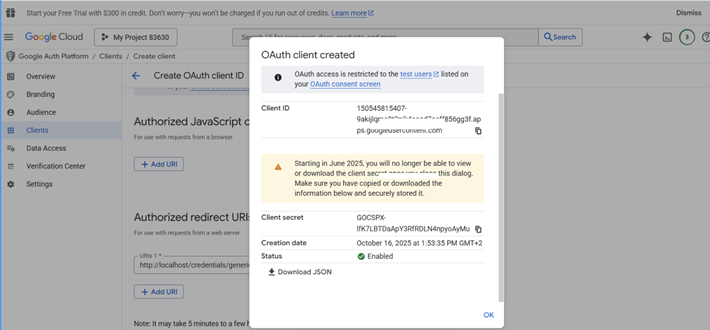
* A dialog will appear with your**client ID** and **client secret**. Copy or download these values and store them securely as you will need the for the PADS4 configuration
* Click on **create**
* A dialog will appear with your**client ID** and **client secret**. Copy or download these values and store them securely as you will need the for the PADS4 configuration
 ## **5. Configuration in PADS4**
To begin:
* Open your **web browser**.
* Navigate to the **PADS4 server URL** (either a DNS name or IP address).
* Log in using an **Administrator account**.
Once logged in:
* Click on **Dashboard**.
* Use the **Toggle Sidebar** button at the **top-right** of the screen.
* Navigate to **Credentials**.
* Then select **Providers**.
* Click on **New**
## **5. Configuration in PADS4**
To begin:
* Open your **web browser**.
* Navigate to the **PADS4 server URL** (either a DNS name or IP address).
* Log in using an **Administrator account**.
Once logged in:
* Click on **Dashboard**.
* Use the **Toggle Sidebar** button at the **top-right** of the screen.
* Navigate to **Credentials**.
* Then select **Providers**.
* Click on **New**
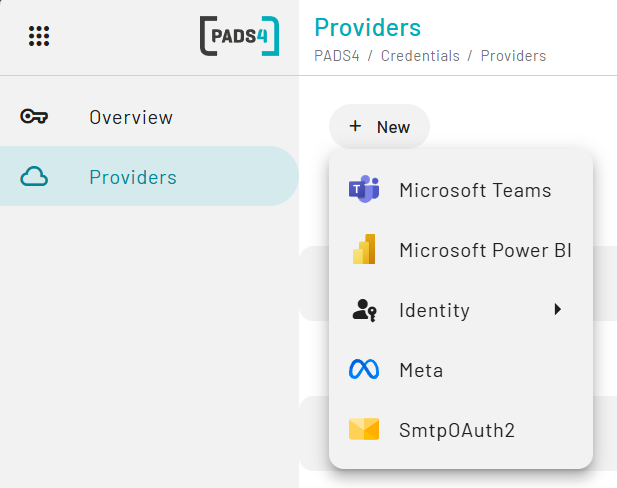 * Select **SMTPOAuth2**
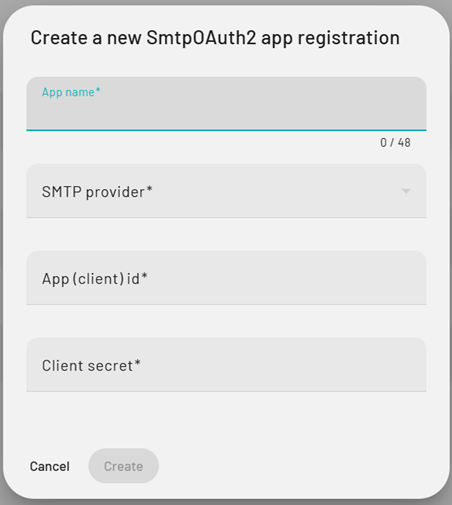 * Fill in the information as follows:
* **App name:** Represent the name of your provider in PADS4 (can be any value)
* **SMTP Provider:** Google
* **App (client) ID:** Retrieved from Google Cloud Console described in step 4
* **Client Secret:** Retrieved from Google Cloud Console described in step 4
* Click on **create**
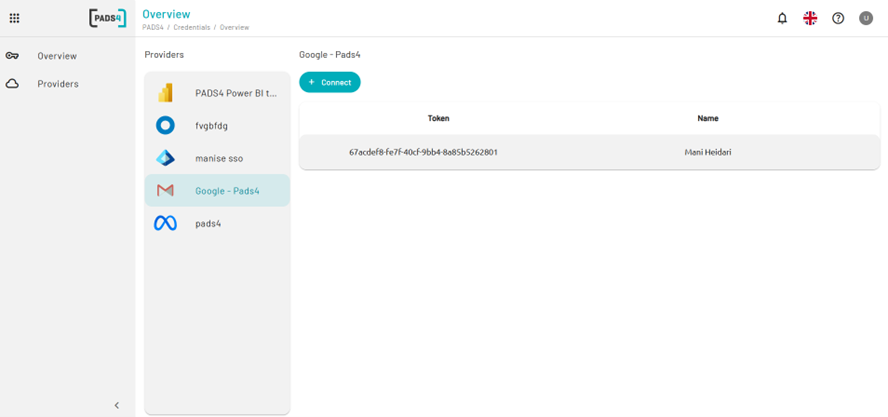
* Now go to the overview page and select the SMTP provider that you have just configured.
* Click connect, choose your user account and grant the request access.
* Fill in the information as follows:
* **App name:** Represent the name of your provider in PADS4 (can be any value)
* **SMTP Provider:** Google
* **App (client) ID:** Retrieved from Google Cloud Console described in step 4
* **Client Secret:** Retrieved from Google Cloud Console described in step 4
* Click on **create**
* Now go to the overview page and select the SMTP provider that you have just configured.
* Click connect, choose your user account and grant the request access.
 ## How to use this set up in the SMTP configuration.
Once logged in:
* Click on **Home**.
* Use the **Toggle Sidebar** button at the **top-left** of the screen.
* Navigate to **Config**.
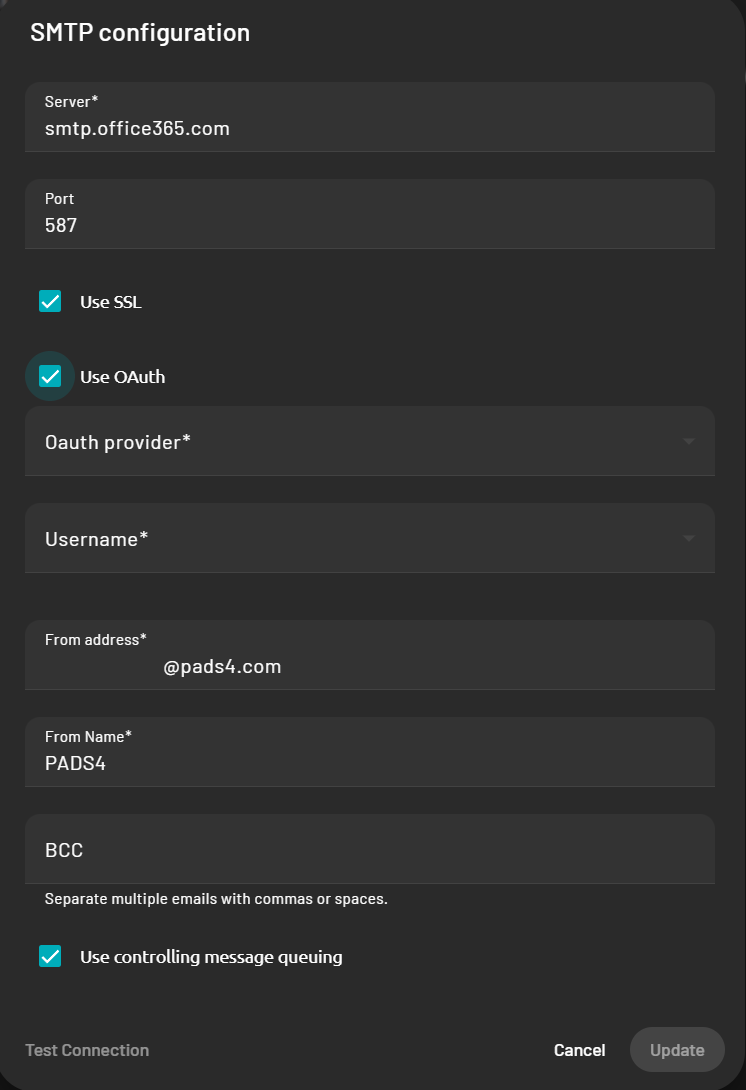
* Then press **Edit**
## How to use this set up in the SMTP configuration.
Once logged in:
* Click on **Home**.
* Use the **Toggle Sidebar** button at the **top-left** of the screen.
* Navigate to **Config**.
* Then press **Edit**